Blackboard Course Merge and Unmerge Tool
How to Merge Courses?
The section merge tool allows instructors to merge class rosters from source/child courses to a designation/parent course so that the instructor just needs to post course materials on the destination/parent course site. All students from both destination/parent and source/child courses can access the course materials.
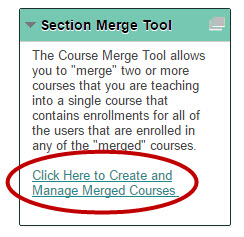
- On your Blackboard Homepage, go to Section Merge Tool module located on the left-hand side. Below the Section Merge Tool, select Click Here to Create and Manage Merged Course.
If you are unable to see the module, follow these steps:
a. On the upper right-hand corner, press Add Module.
b. You can scroll down, search in the Search bar, or Browse by Category to find the Section Merge Tool module. The modules are listed alphabetically.
c. Click Add under Section Merge Tool. Notice the module has a description and category. In the future, browse through the Other category to find this module.
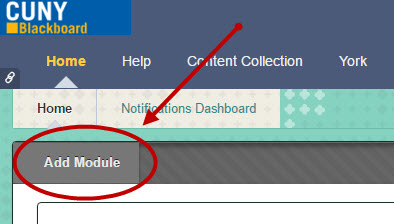
d. Your module will appear on the Home page.

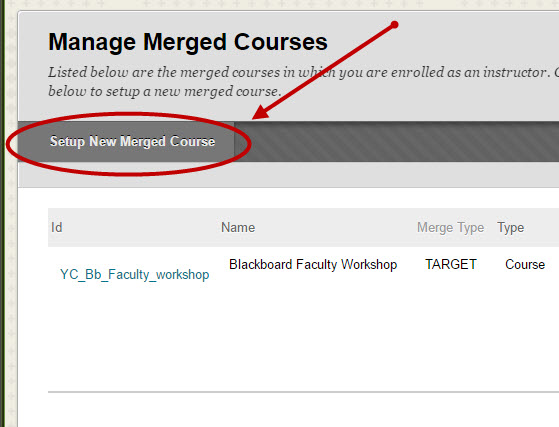
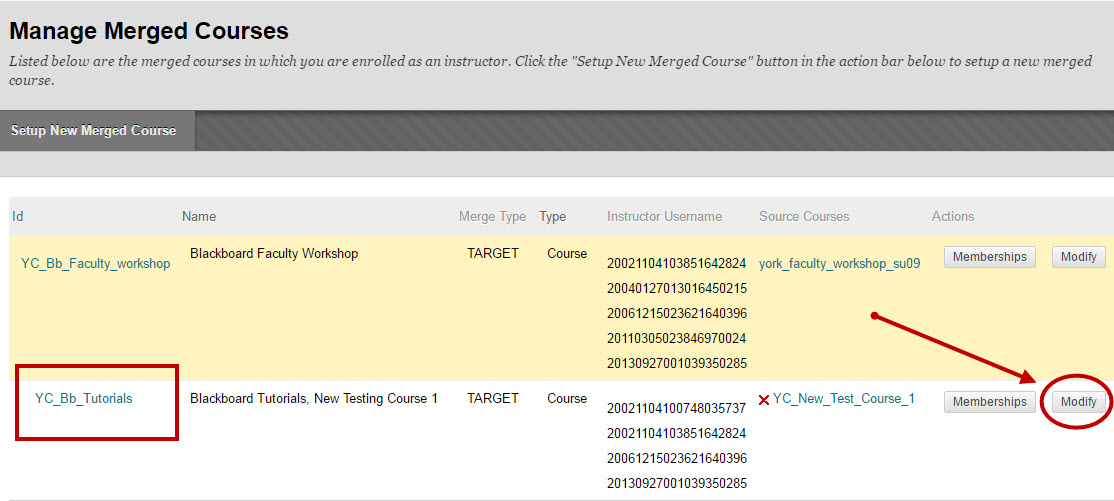
2. Inside Manage Merged Courses screen, click Setup New Merged Course and you will see a list of the courses you are teaching.
Note: Merging courses only merges course rosters and not their contents.
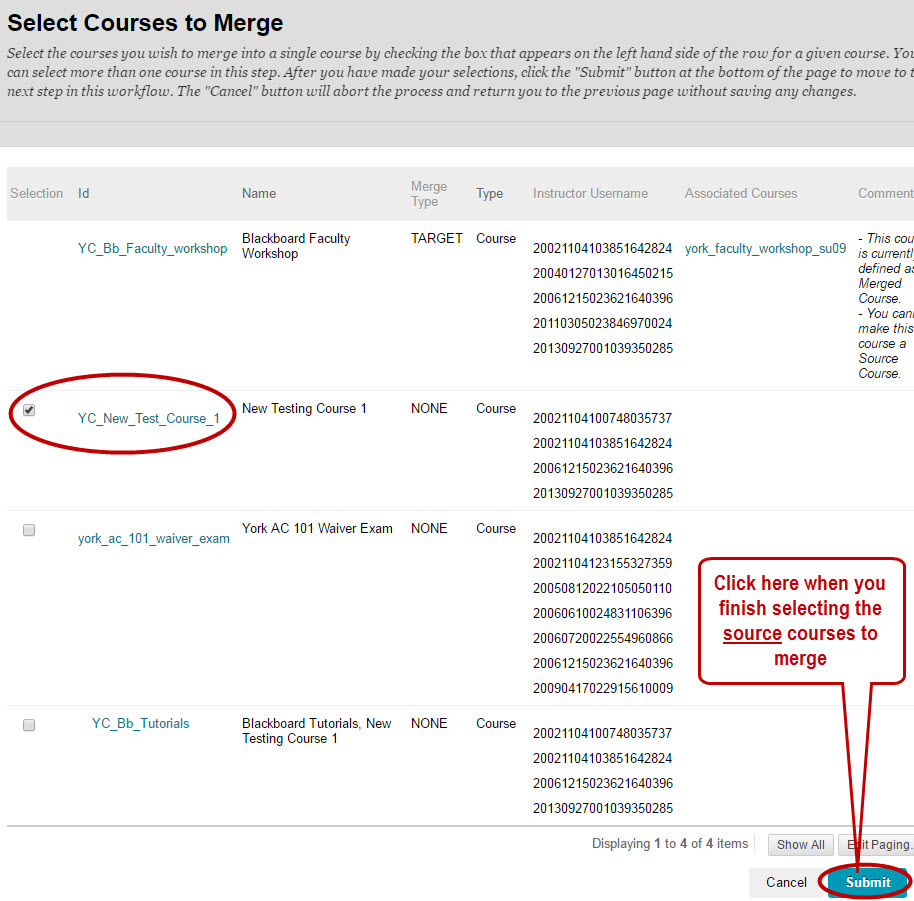
3. Select the check boxes next to all of the courses whose rosters you want to merge to a parent/destination course. If they are listed on multiple pages, click "Show All" at the bottom right to display all of your courses so that you can select. Then click Submit. The courses on the Select Course to Merge page are also known as source or child courses.
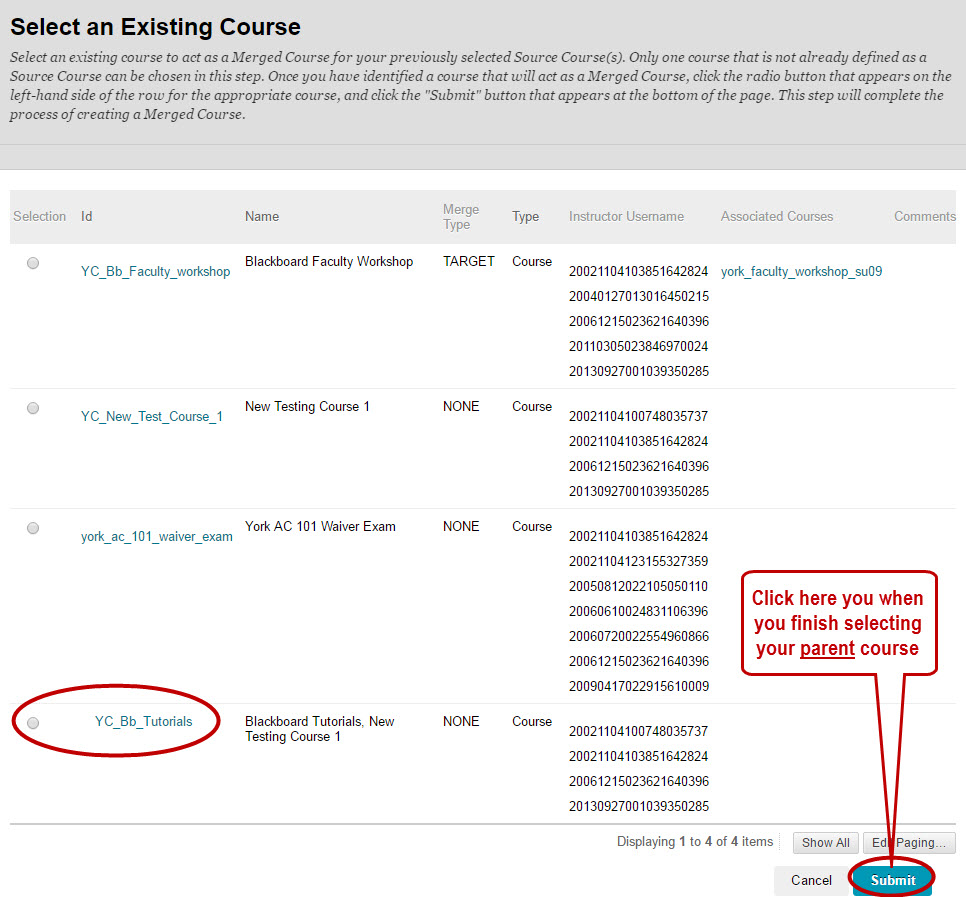
4. On the Select an Existing Course page, select the course where you want to post all course content. It is called parent or destination course. The rosters from child/source course(s) will be merged into the roster of the parent or destination course. The students will access and view your content from this parent course.
5. Click Submit. Make sure you confirm by clicking OK. A green notification will appear to confirm the courses were merged. The parent course name will be on the page while the associated course(s) will be under Source Courses below:
6. It is advised to make the child/source course(s) unavailable to students. As all course materials are in the parent course, there is no need for students to access the child course(s).
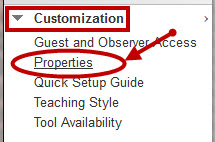
a. Go to each of the child/source courses. Under Control Panel located on the bottom left side, go to Customization.
b. Then, click Properties.
c. Select No radio button for Set Availability. Click Submit.

7. Change Course Name and Description for the parent/destination course. Go to the parent course and modify the course name to include all merged courses/sections.
a. Under Control Panel, go to Customization.
b. Go to Properties.
c. Modify the course name and description and click Submit.
Notice that the parent course name has changed while the child course is not currently available under My Courses on the Home page.


How to Unmerge Course?
Instructors can unmerge courses in case you merged wrong courses.
- Go to Section Merge Tool then press Click Here to Create and Manage Merged Course.
- Search for your merged course and click Modify on the right-hand side.
- Click Disassociate and a notification of unmerging courses will appear.
- To exit, click OK on the bottom right-hand corner.

Please Note: Once you disassociate the courses, you will need to re-modify the parent course name.
Revised: April 29, 2024
York College / CUNY
94 - 20 Guy R. Brewer Blvd.
Jamaica, NY 11451
P: 718-262-2000