Setting Up Your Course In BrS From Scratch
Tutorials on setting up your course navigation, gradebook, posting multimedia content, creating a syllabus quiz, creating a discussion forum for students to introduce themselves and get your course ready for the first day of the semester.
To access BrS, go to https://brightspace.cuny.edu/ page and log in with your CUNY Login username and password. Bookmark this page on your favorite browser so that you can access it easily at any time.
- Course navigation bar or Nav Bar
- Content - Course organization and navigation
- Setting up the grade book
- Creating a syllabus quiz or survey
- Creating a discussion forum and a topic for students to introduce themselves
- Posting syllabus
- Posting multimedia content and making it accessible
- Customizing your course homepage
- Viewing your course as a student
- Making changes to your course top navbar
- Viewing your class roster
- Making your course available/active to students
- Creating an Announcement to welcome your students
Course navigation bar or Nav Bar
All York courses have the same default top navigation menu, e.g. Nav Bar, shown in the screenshot below. Click More at the far right to access more tools and the Course Admin panel.

The course top menu enables you and your students to quickly access a specific activity such as a discussion forum, an assignment, or a quiz in your course. However, it doesn't provide a sequence you want students to follow. On the other hand, the Content section provides the possibility for you to organize your course in weekly learning modules.
Content - Course organization and navigation
BrS's Content could be confusing. You can think of it as a place to organize your course and define the sequence. It is like the content areas such as syllabus and weekly modules in Bb. In the Content area, you can add course materials in text, image, audio and video formats, activities and any types of assignments. It is used to provide a road map that your students can follow in the entire semester.
Click Content on the top course menu. you will see a screen as shown below.
Overview
The Overview page is the entry point of the content section. It is a static page. We recommend not to use it. If you leave it empty, students will not see this page but are led to the "Table of Content" page.
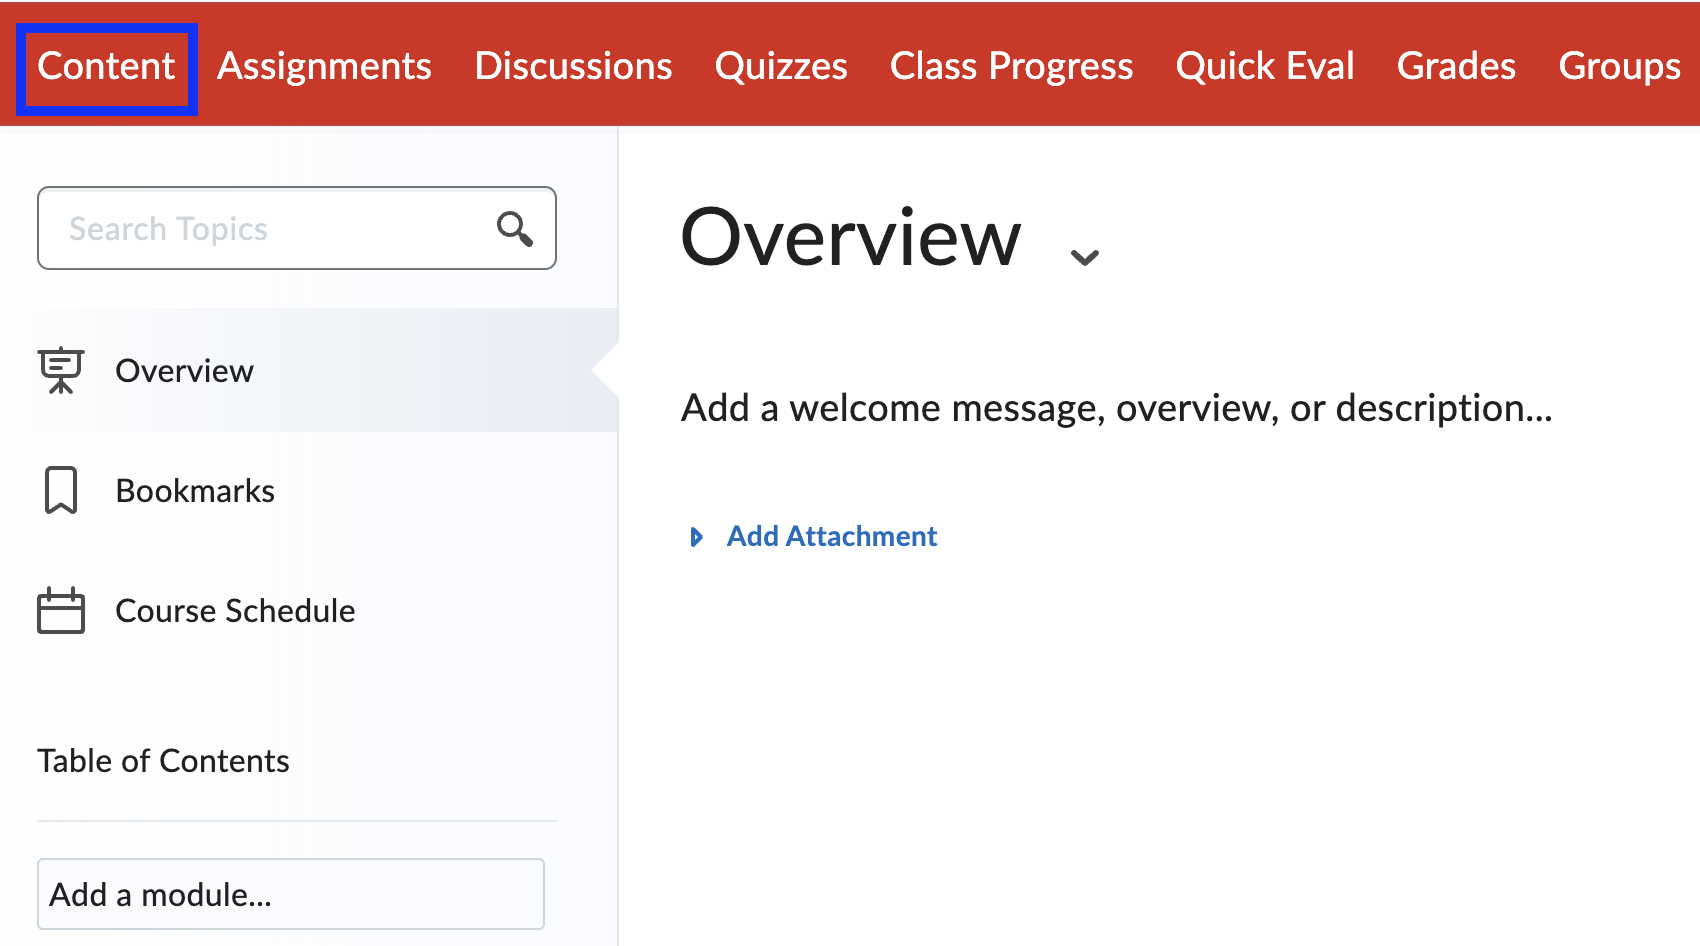
Table of Content and Content Modules
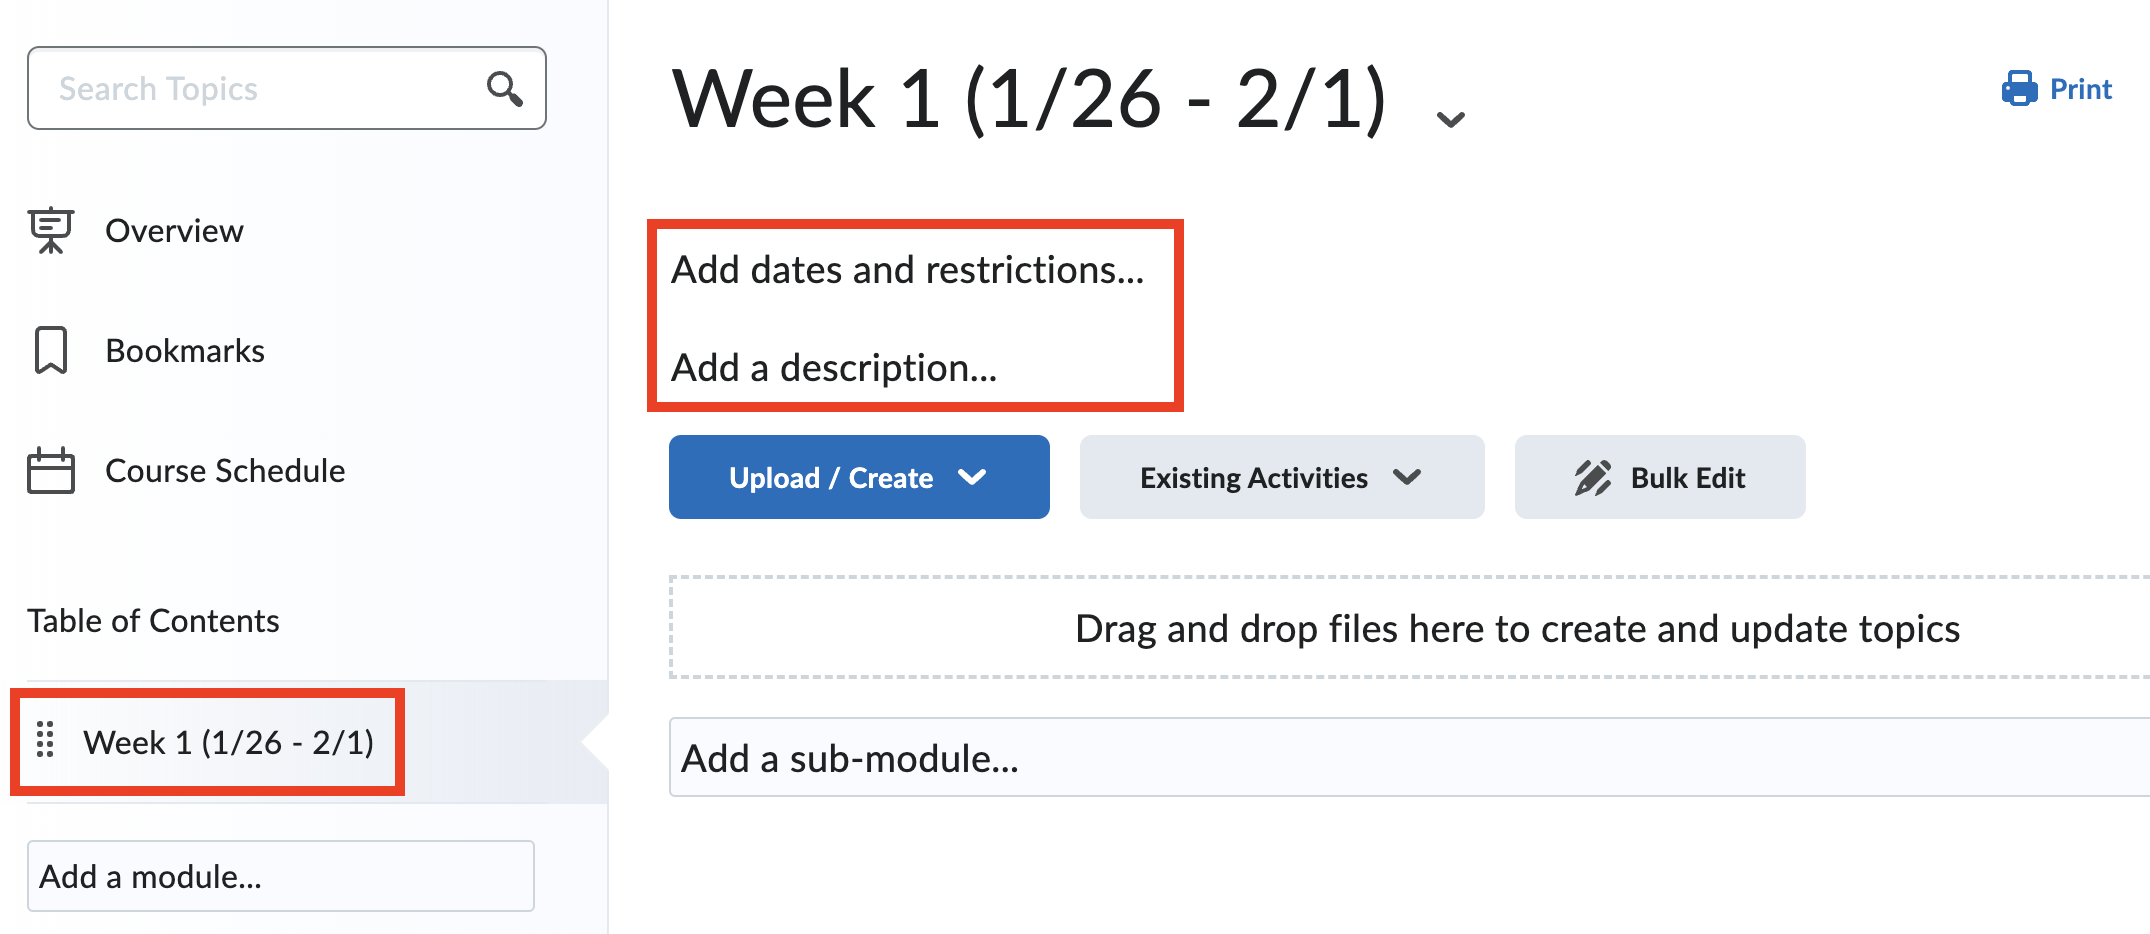
We recommend that you create weekly modules here. Click the box with "Add a module... " under Table of Content and type "Week 1 (1/26 - 2/6)," for example, and press Enter. Repeat the same steps to add more weekly modules under the Table of Content. If you prefer to organize your course in Course Materials, Assignments, for example, you can follow the same steps to create these pages.
On the Week 1 or any content module page, you can add the dates when you want students to see this module and a description of the module by clicking on them. We recommend that you add the module learning objectives in the description. See the section on Posting Multimedia Content below, you will learn different ways to create or upload text, audio and video content.
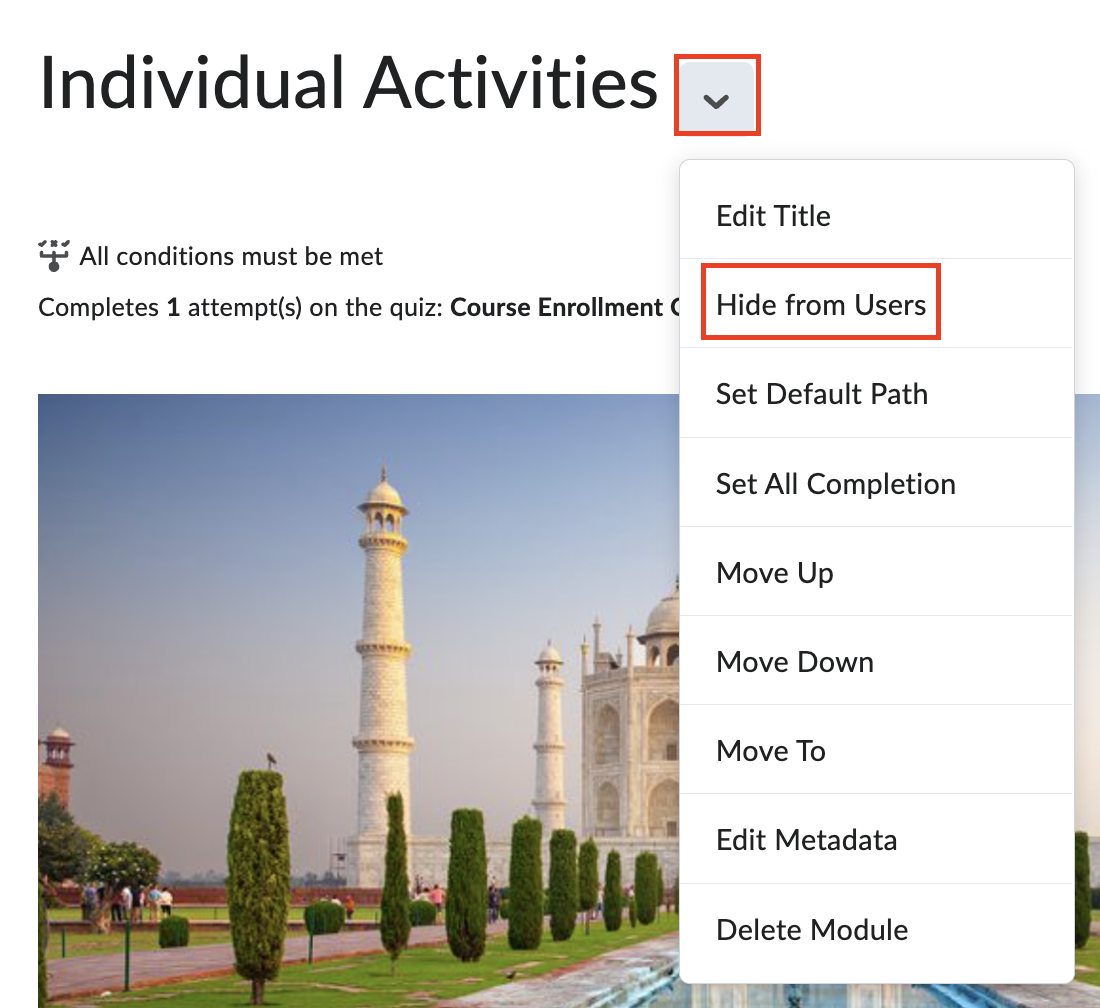
Please note: After you set up a Start Date for a content module or submodule, students can still see the module name and the list of the items you added in the module. But they cannot click on any of them before the Start Date. If you want to hide the module, you will click the down arrow next to the module name and select Hide from Users. When you want students to see the module, click the down arrow next to the module name and select Make Visible to Users.
For more information on what you can organize course course materials and activities in the Content area, check out the web page Add and organize learning materials in the Classic Content experience. What we have is Brightspace's Classic Content user interface.
Something new in BrS
Every content module has a Download button with which students can download the content in that module.

Bookmarks
Both instructors and students can bookmark any course content pages if they wish to access them quickly in the future. If users want to bookmark an assignment or a quiz, they need to access it from a content page provided instructors added a link to the assignment or quiz on a content page.
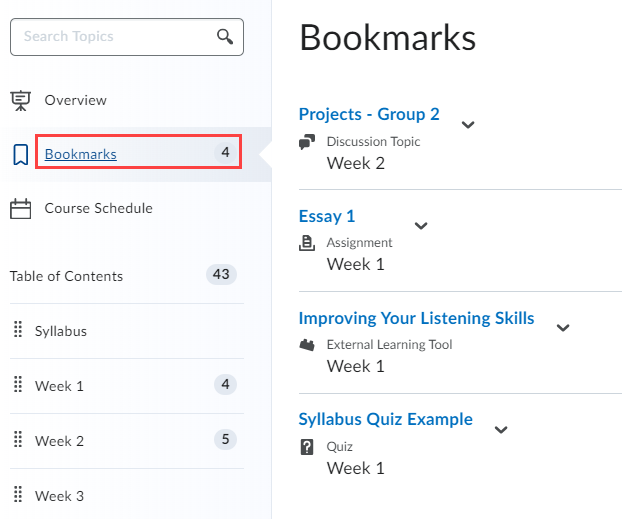
The screenshot below shows a content link posted on a content page Assignments. Click on the bookmark icon on the right to bookmark it. The icon will become solid. Click on it again to unbookmark it.

All bookmarks will appear on the Bookmarks page.
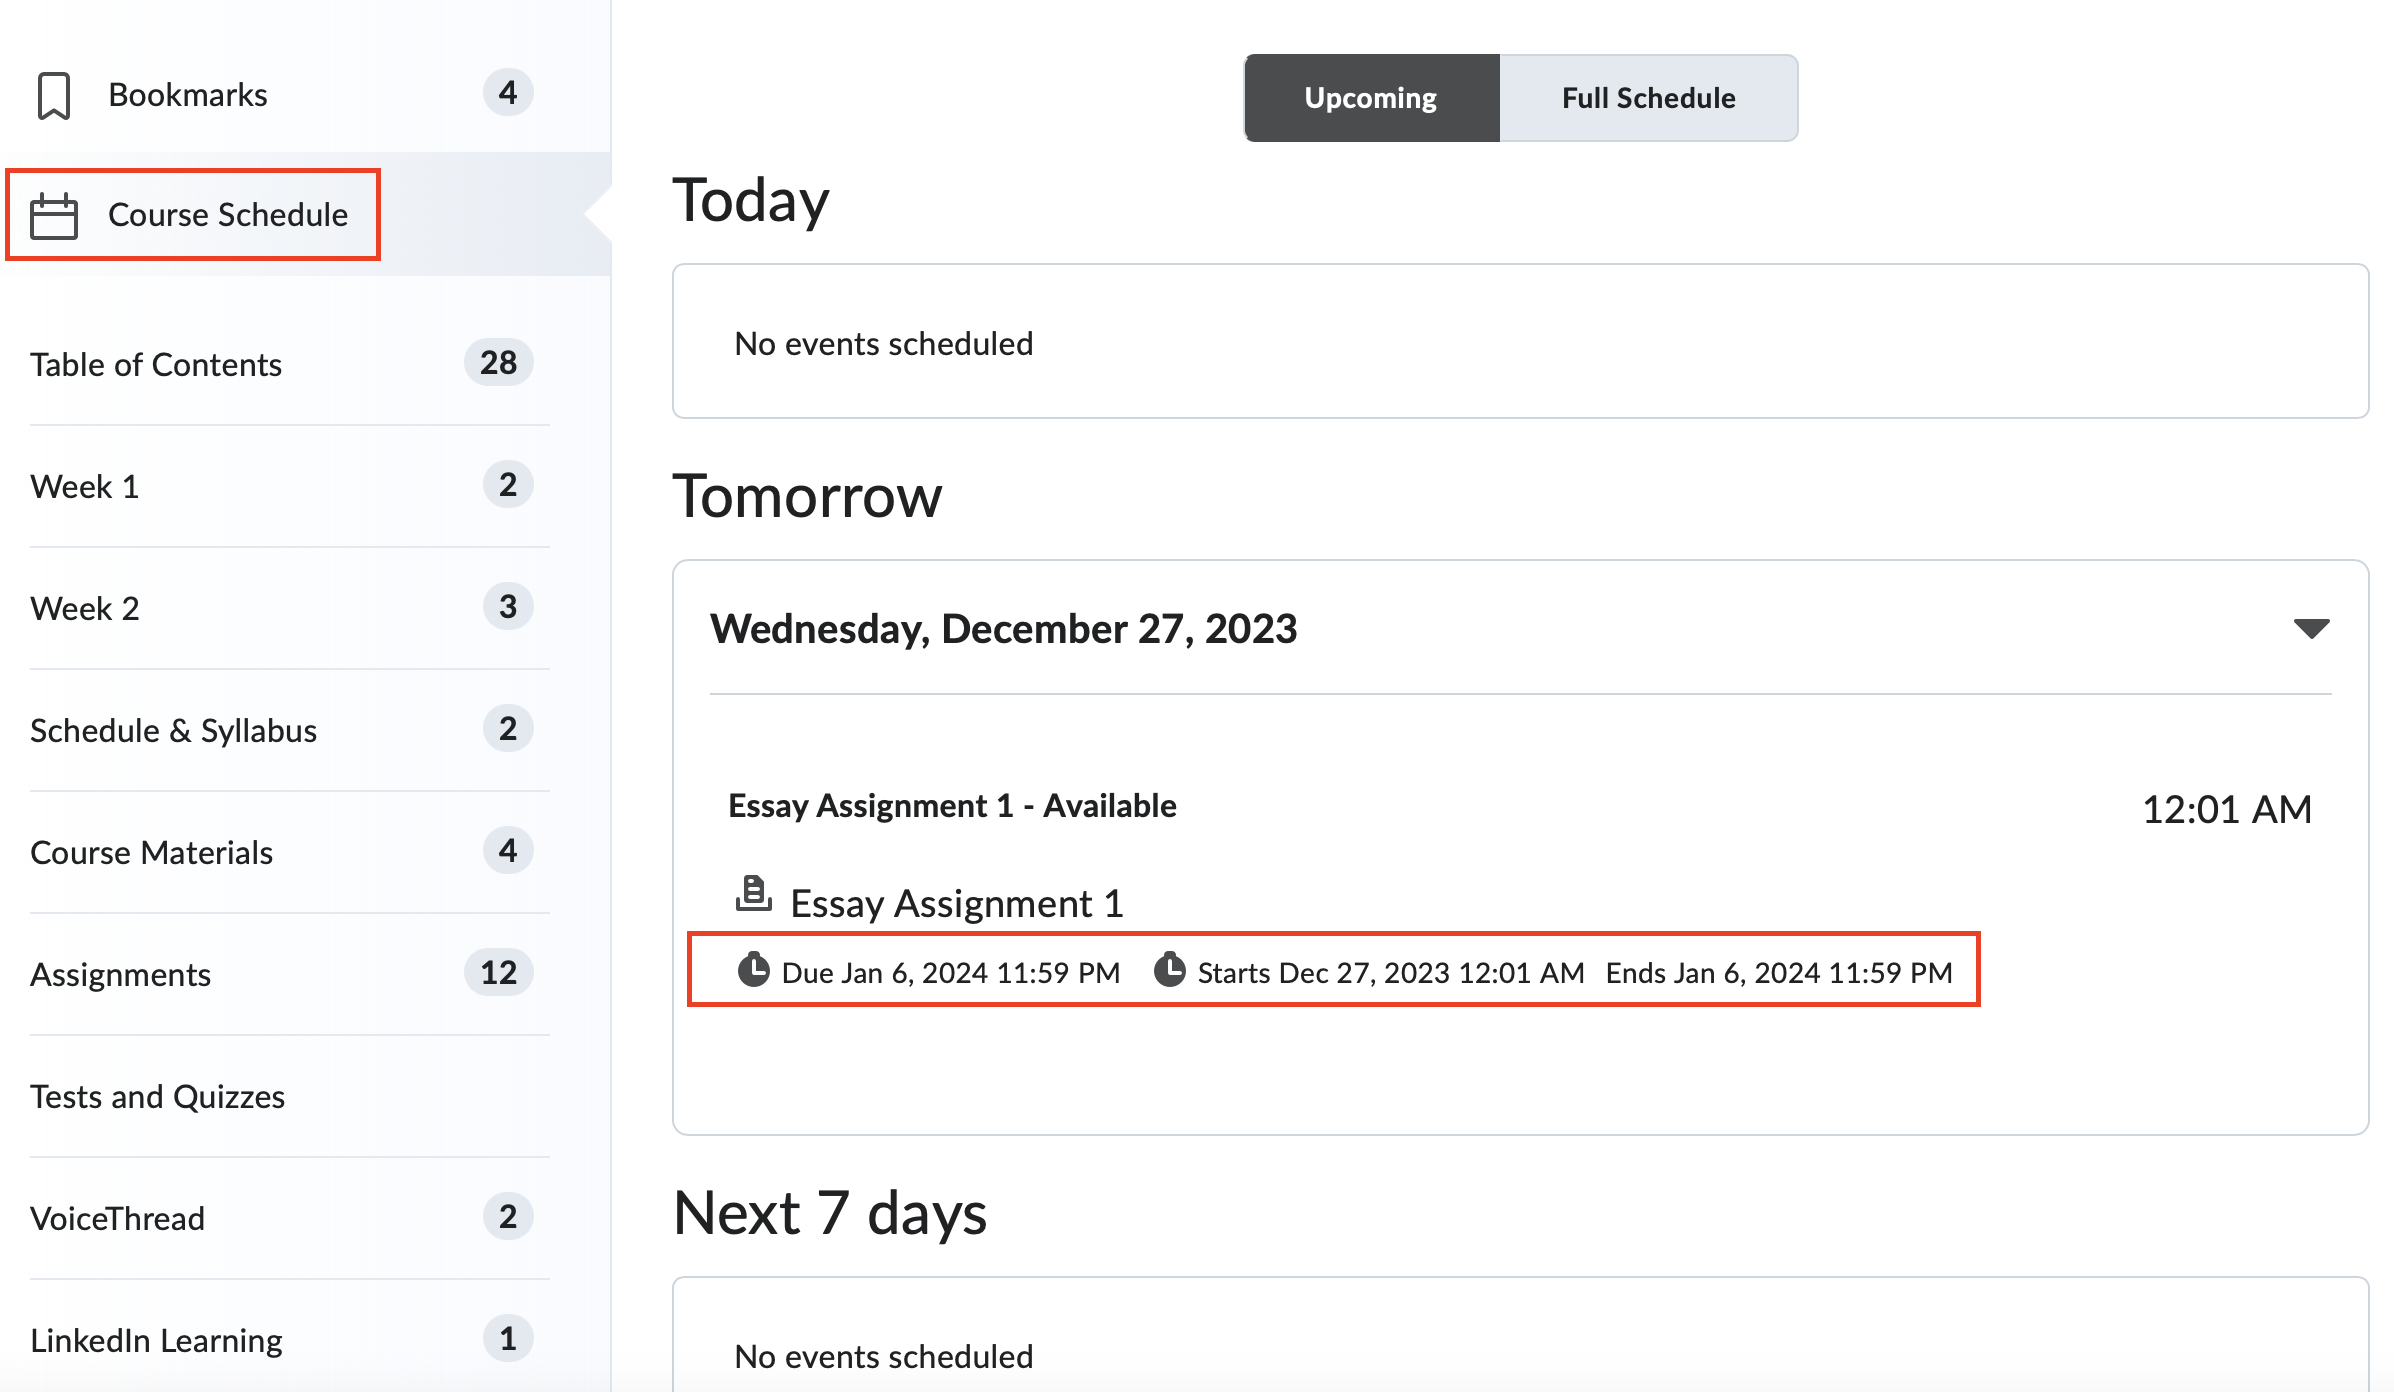
Course Schedule
On this page all Due dates, Start and End dates you set up for assignments including quizzes, discussions, content items will be displayed. You cannot add your class schedule in your syllabus here. The information on this page is pulled from your date settings in the course in BrS.
Check out the linked page to learn how you can make the Start and End dates to display on the Course Schedule page.
Setting up the grade book
Action 1 - Running the Setup Wizard
Follow steps below to set up the grade book through the Setup Wizard.
1. In your course top navbar, click Grades. Then click Setup Wizard on the Grades page.

2. Scroll all the way down and click Start.
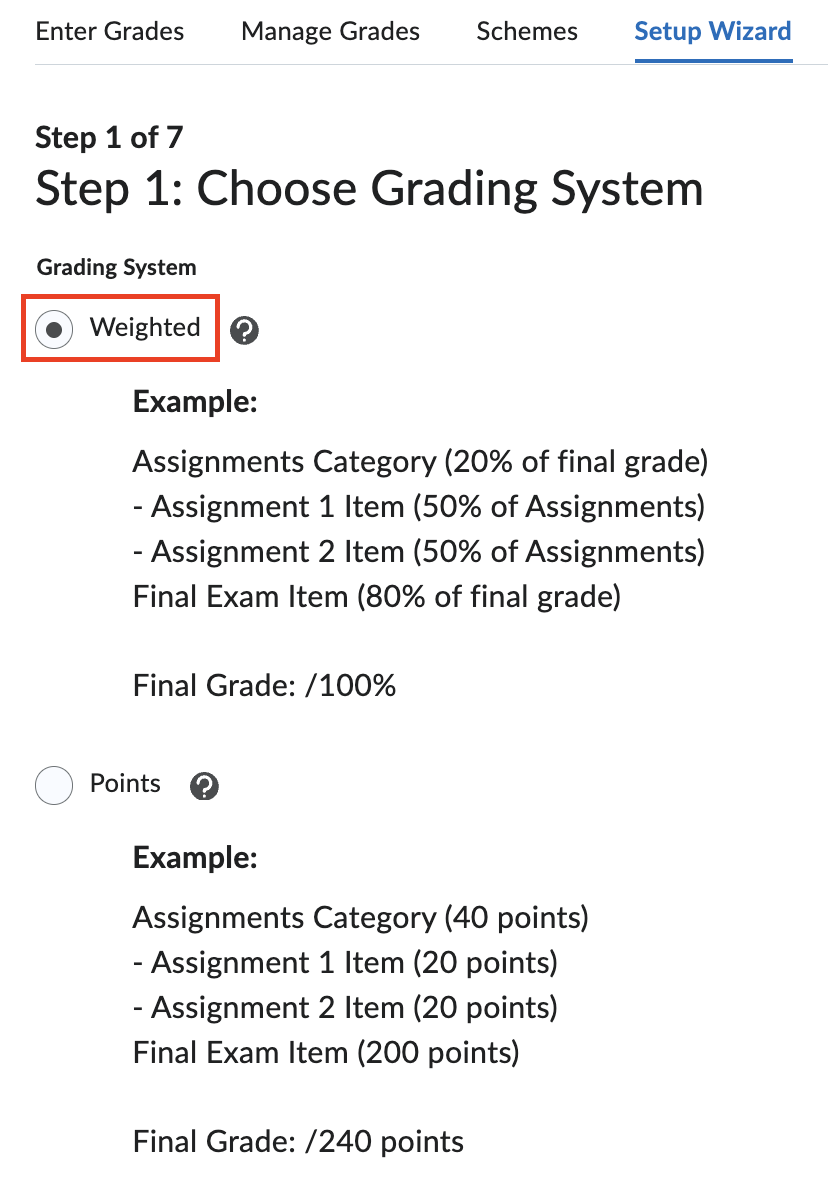
3. On the Step 1 page, if you use weighings, e.g. percentage, to calculate the course grades, check the radio button for Weighted. If you use points, check the second radio button for Points.
Click the question mark to learn the meaning of the terminology.
Afterwards, scroll down to the bottom of the page and click Continue.
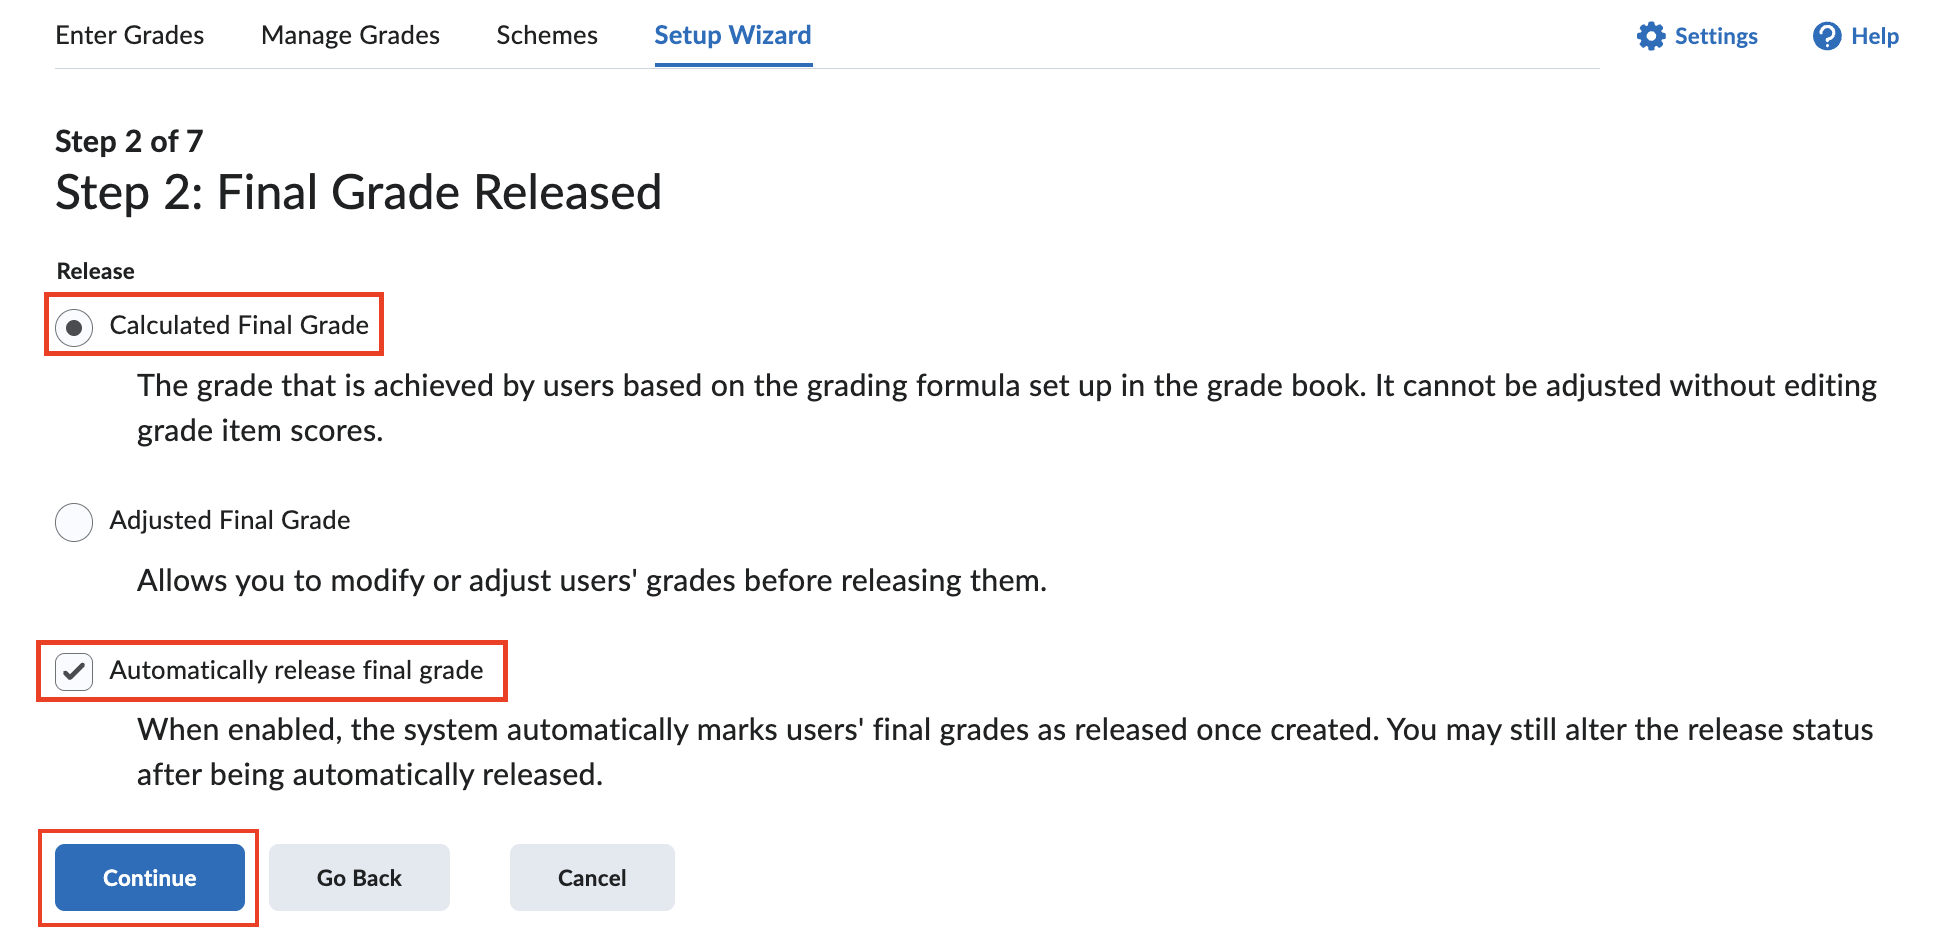
4. On the Step 2 page, check the radio button for Calculated Final Grade under Release. In addition, check the Automatically release final grade box. The latter allows the course calculated grades to be released to students.
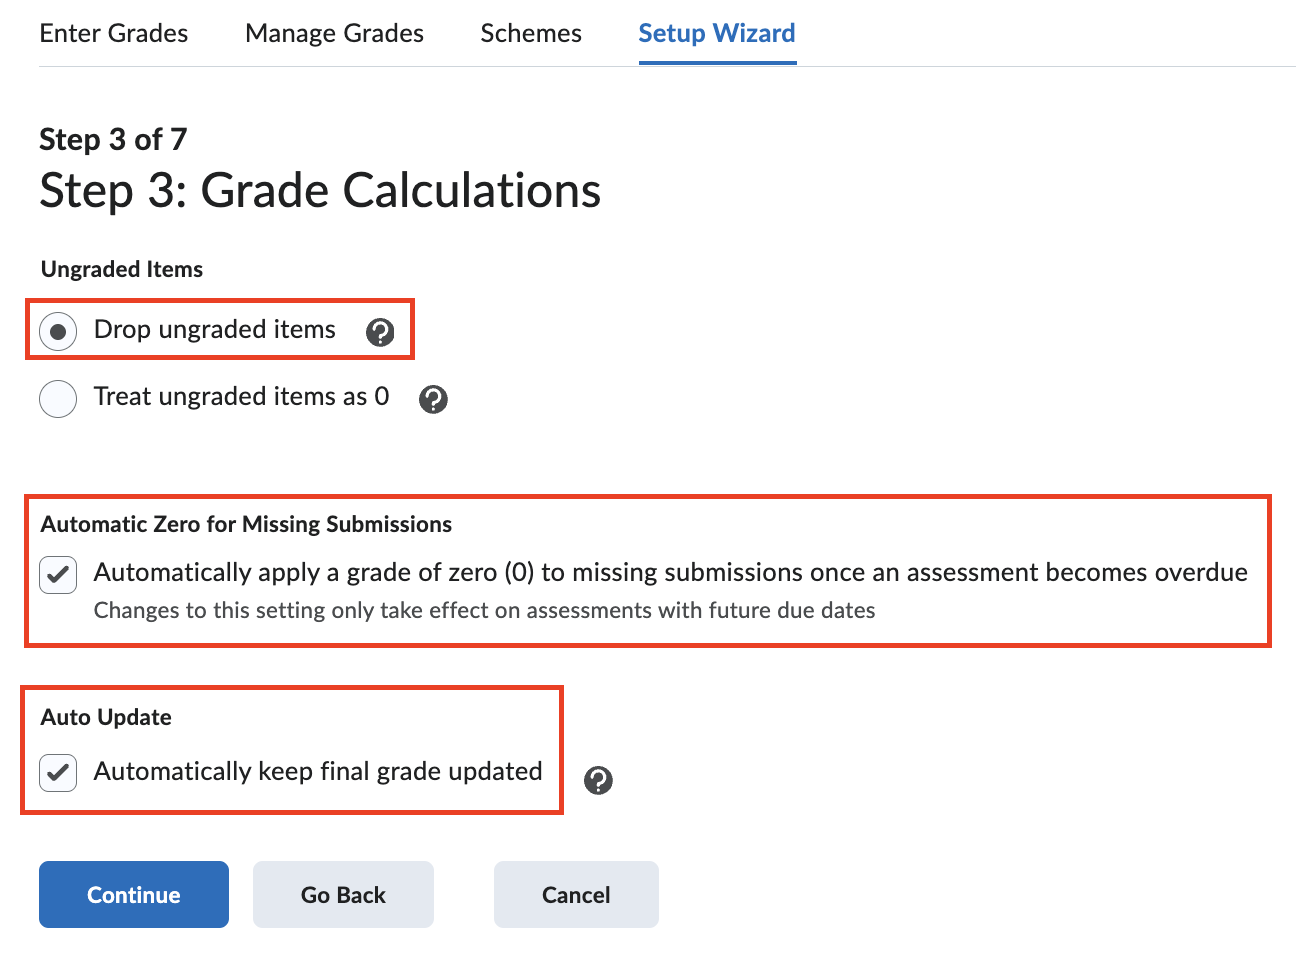
5. On the Step 3 page, check the radio button for Drop upgraded items. It means that the assignments, quizzes and other graded activities are not assigned 0 by the system before their due dates, and the course calculated grade during the semester would not include those assignments, quizzes and activities that are not graded.
You should check the box for Automatic Zero for Missing Submissions if you select to Drop ungraded items. It will assign a 0 grade if no submission after the due date.
Next, check the box under Auto Update. It means that the course final calculated grade is updated whenever a new assignment, quiz grade is added or modified. Afterwards, click Continue at the bottom of the page.
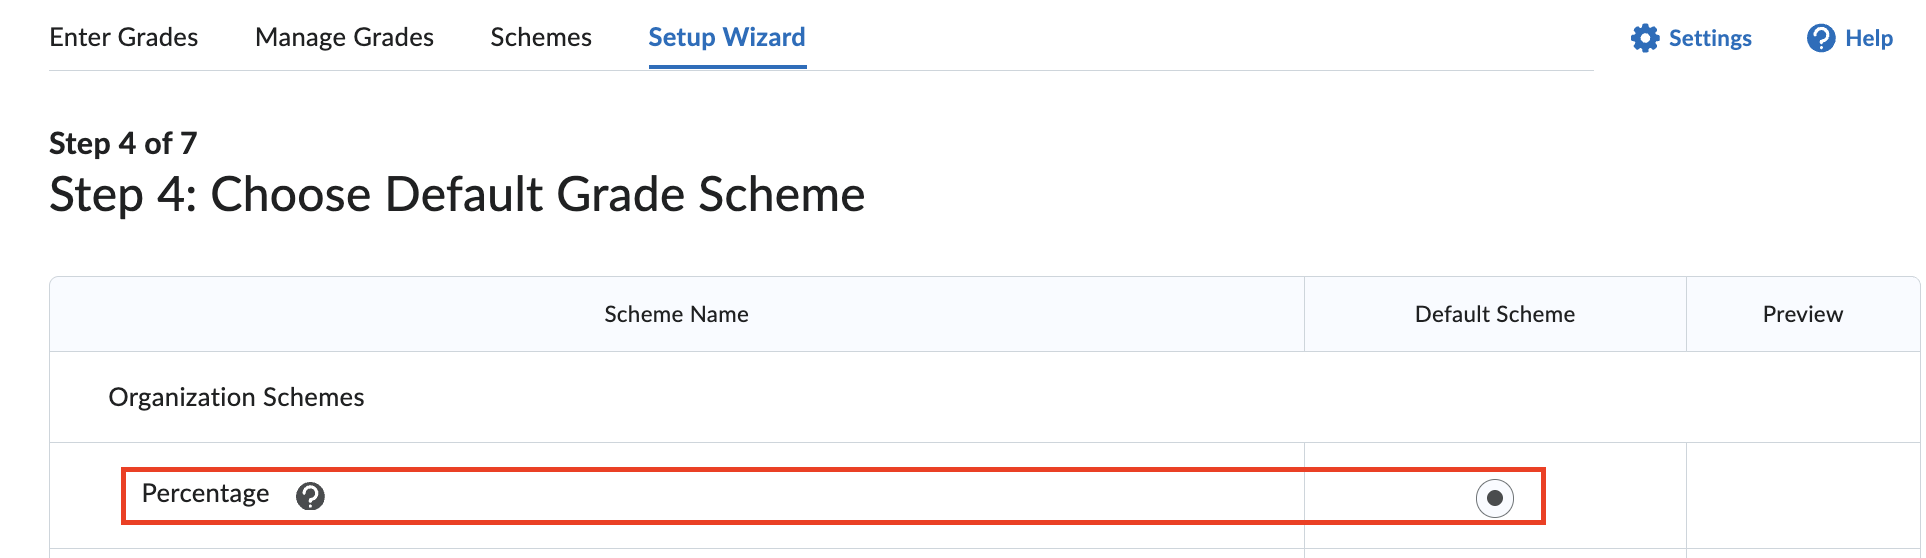
6. On the Step 4 page, leave the default setting as Percentage. This defines the grade scheme for all grade columns in the course. It will display points and percentages for grades. If you want to use letter grades for a specific grade column and the course final calculated grades, you can edit the specific grade columns to make change later.
Again, click Continue at the bottom of the page.
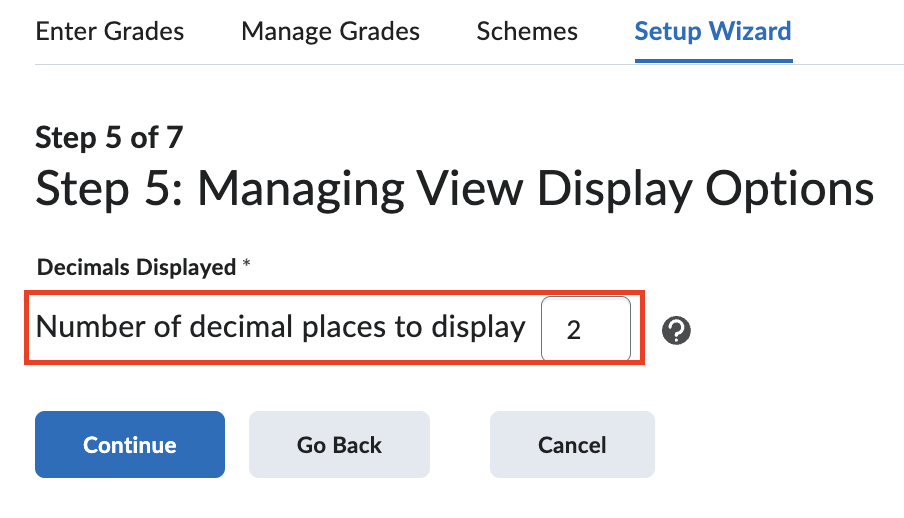
7. On the Step 5 page, leave the default setting "2" unless you have good reason to change it. Click Continue.
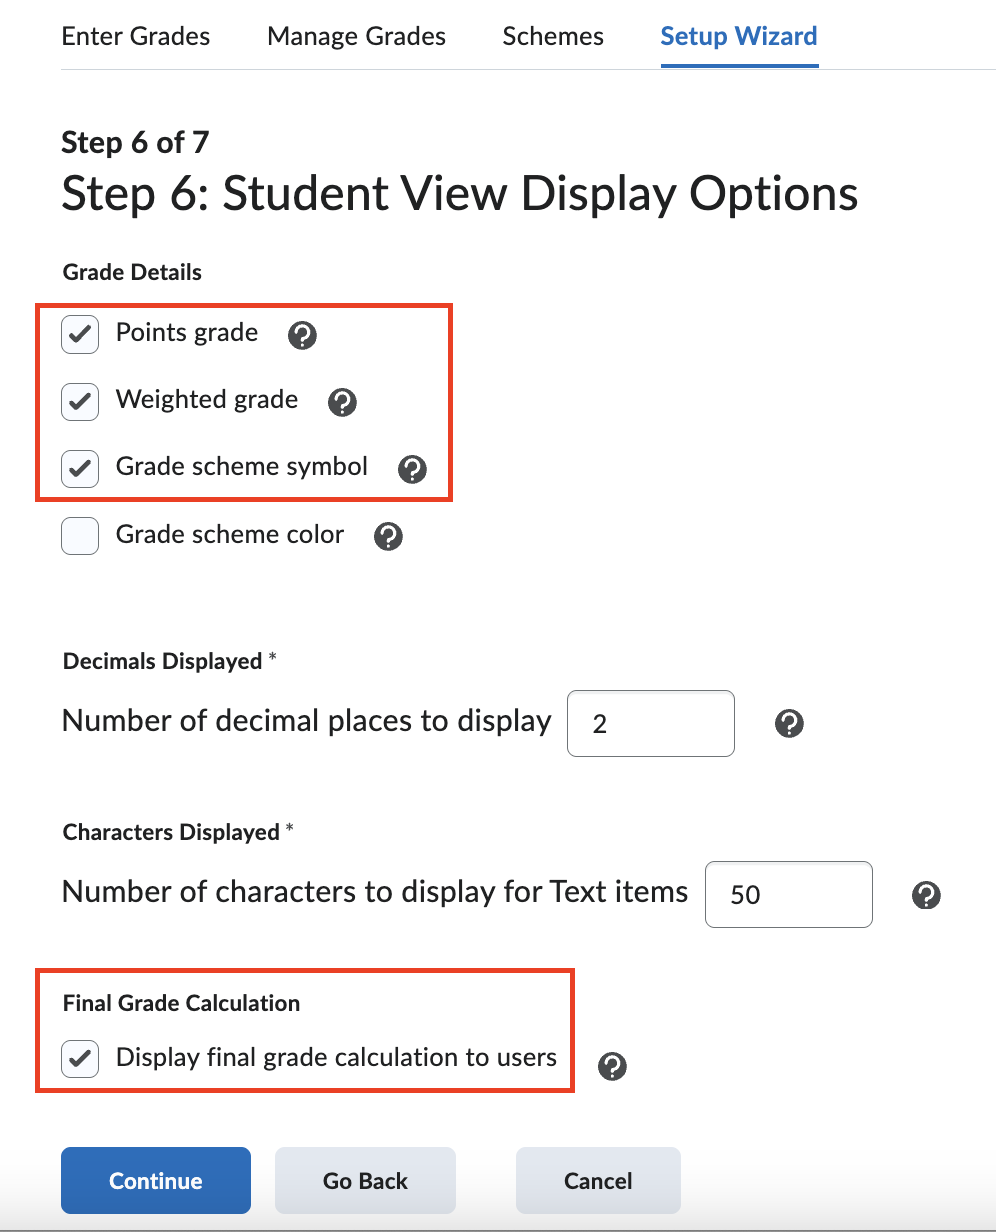
8. On the Step 6 page, we recommend to check those items in the red rectangle boxes. Leave others as the default values. Click the question mark to learn the meaning of each of the terminologies. Afterwards, click Continue.
9. On the Step 7 page, review all grade settings. If all are correct, click Finish at the bottom of the page to save all changes.
Action 2 - Creating Grading Categories
This action is only needed if you use weighted grading system to calculate the final course grades.
Open your syllabus. You will map the grading breakdown in your syllabus to the Categories in BrS grade book. We'll use an example syllabus with the grading breakdown as shown below.
- Quizzes 20%
- Online Discussions 20%
- Assignments: 40%
- Final 20%
1. On the Grades page, click Manage Grades > New > Category.

2. On the New Category page, type in a category name that is listed in your syllabus. In this example, it is Quizzes.

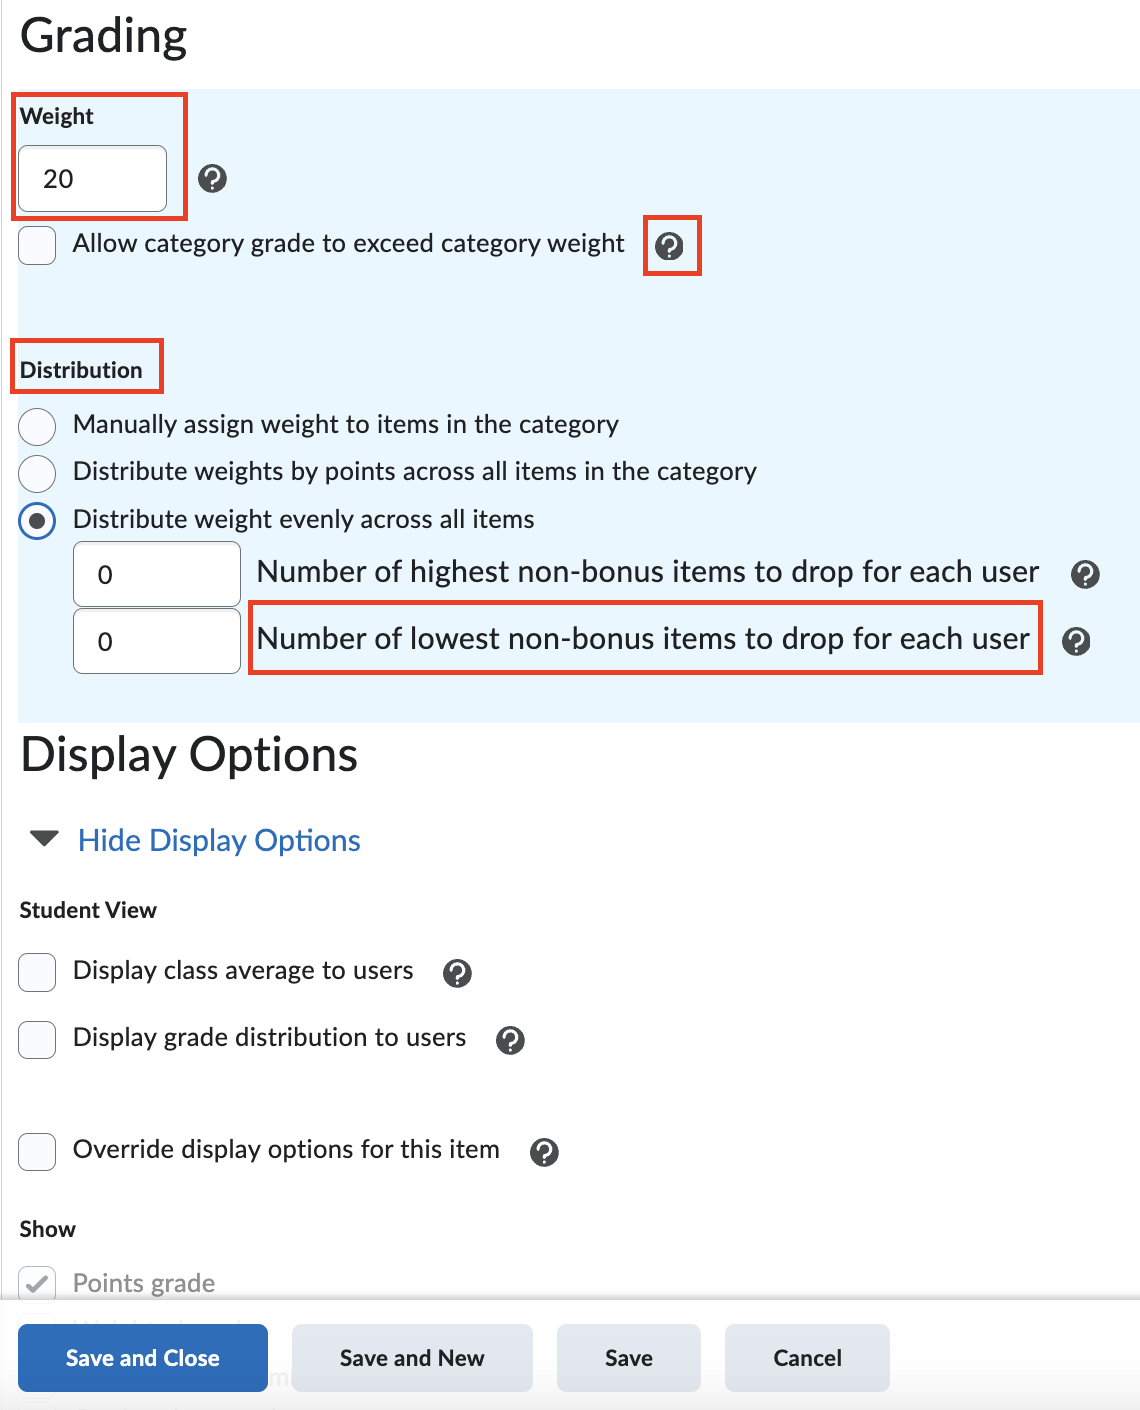
3. Continue with the settings on the New Category page, fill in the weighing for this category. In our example, Quizzes category weighs 20% (see the screenshot below). Click the question mark to see a description for that specific setting.
4. In the Distribution section, there are 3 options. The important question to ask here is what impact to student learning each option will have? We recommend that you review Maryellen Weimer's article about Calculating Final Grade before making decisions.
You can choose either Manually assign weight to items in the category or Distribute weight evenly across all items under Distribution. The former allows you to weigh items progressively or assign different weights to different items while the latter allows you to drop one or more lowest grades while distributing the weightings evenly in the category.
In this example, we choose to distribute weight evenly and do not drop any quiz. Click Save and Close after you finish all settings on the page.
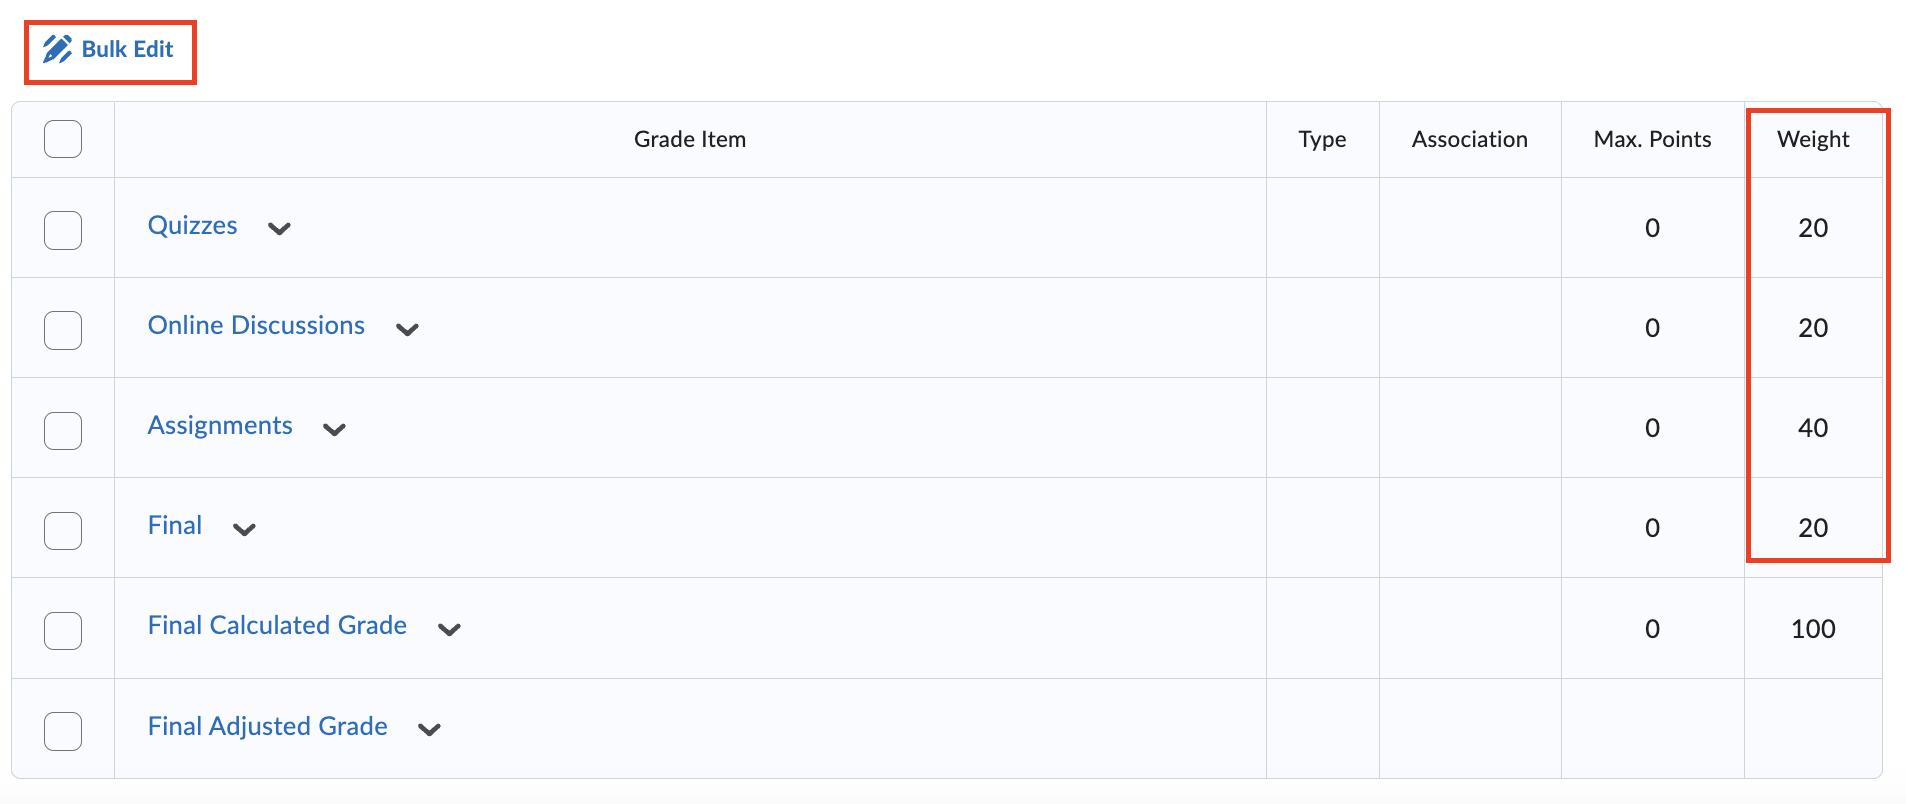
Repeat the steps listed 1 - 4 in above to create categories for the rest of the categories in your syllabus. Afterwards, the Manage Grades page display all categories with respecitve percentages that add up to 100%.
If you need to adjust the weights for all or some of the categories, select the check boxes on the left and click Bulk Edit to modify.
Now the grade book setup in your course is completed. When you create individual assignments, quizzes, discusison topics and final, make sure to link them to the appropriate categories. You can find how to do it in the section on Linking the grade of an assignment to an appropriate grading category.
Recording Class Participation
As CUNY is a non-attendance school, the Attendance tool in Brightspace is disabled. Instead of recording attendance, here is an effective and rewarding teaching practice that we recommend: make class participation important by making it count in the course grade. The linked page below shows how you can do so in the grade book.
Recording Participation in Grade Book
Creating a syllabus quiz or survey
Instead of reading through your syllabus in the first day of the class, there are two activities you can use to help students get the most out of your syllabus.
- A syllabus quiz - In a syllabus quiz, you can create questions that students will answer to demonstrate their understanding of the important information in the syllabus.
- A syllabus survey - In a syllabus survey, you can ask students to pick 2 or 3 things in your syllabus about which they feel excited or inspired; 5 facts or requirements they think are important; any questions they have about the syllabus. Note that survey results can be anonymous or not depending on the survey setting you choose.
After either activity, you can discuss the results with students in a class meeting or discussion forum.
Syllabus Quiz
Follow the steps in the following tutorial to create a quiz with questions related to the information in your syllabus.
Syllabus Survey
Something new in BrS
You can do branching in a survey.
A survey can be conducted anonymously or not anonymously.
Go to the Course Admin page. click Surveys. Follow the steps in the video tutorial below to create your survey.
After the survey is created, to deploy it, go to a Content page, click Existing Activities dropdown button and select Surveys and select the survey you just created.
Creating a discussion forum and a topic for students to introduce themselves
Interactions between faculty and students and among students are important to motivate and support student learning, especially in online courses where students easily feel isolated. Creating a discussion forum at the beginning of a semester for students to introduce themselves and greet one another can be an icebreaker to building a learning community. You can also create a discussion forum for students to post questions about course topics or assignments. In this way, answering one question posted by one student serves as an answer to all students who have the same question.
Something new in BrS
Students can post their responses in audio and video formats, in addition to text. Instructors can also respond in audio and video formats.
Something different in BrS from that in Bb
The Discussions tool in BrS is structured differently from that in Bb. In BrS, a Forum is used to group discussion topics. You cannot grade a forum, nor students can respond to a forum. You have to create Topics in each of the forums and grade topics. Students can respond to each of the topics by adding new threads. Below are some suggestions on how a forum can be structured.
- If you have one or less than one discussion topic each week on average, create one forum called "Class Discussions," for example, for the entire semester. Then, under this forum, create topics such as weekly topics or biweekly topics.
- If you have a few topics each week, create a forum for each of the weeks, for example, Week 1, Week 2. Then under each weekly forum, create topics for the week.
If you create a topic directly without a forum, BrS will create a forum with the same name as the topic for you and list the topic under that forum.
Watch the following short video to learn how to create a new forum.
Watch the following video to learn how to create a topic under a forum.
For group discussions in BrS, see the tutorials for Groups Activities.
Posting syllabus
Setting up a digital syllabus in your BrS courses
Use the Simple Syllabus tool to create a digital syllabus that is interactive, dynamic, multimedia-rich, ADA compliant and cloud-based.
- If you already used Simple Syllabus for your syllabus in Bb
- Adding your digital syllabus to BrS
- Editing your digital syllabus on the Simple Syllabus platform within BrS
- Viewing your digital syllabus as a Learner
Uploading your syllabus file
If your department hasn't adopted eSyllabus, you can post your syllabus and other course documents by following the steps listed below.
- Go to your course Content section from the top navigation bar.
- Add a content page called Syllabus, or go to any appropriate content page you have created.
- On the Syllabus page, click Upload/Create and then select Upload Files.
- Choose where you want to look for the syllabus or document. For example, your computer, OneDrive or Google Drive.
- Follow the screen instructions to upload the file.

Posting multimedia content and making it accessible
Brightspace's content editor enables you to add text, audio, video content as well as links to web pages and to other learning activities in the course.
Posting multimedia content
Review the information in the linked web page below to learn each of the icons on the content editor toolbar and how to add text, images and audios/videos.
A quick review on the Content Editor in BrS
Accessibility of the content created in the content editor
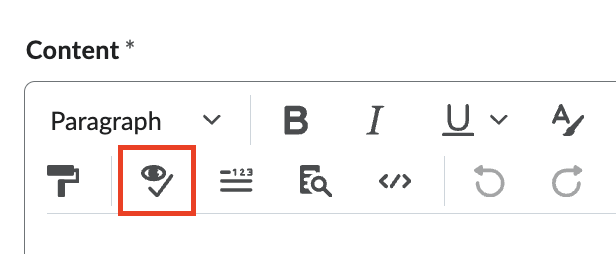
In the content editor, click the "Accessibility Checker" icon as shown below to check and fix accessibility issues. BrS will describe the issues on a panel at the right and provide suggestions to repair the issues.
For more information on accessibility checker, take a look at the article Improving Your Course with Brightspace Accessibility Checker.
Video and Audio Content and Media Library
For video content, you can either add it from the "Insert Stuff" toolbar icon in the content editor or first create it in your "Media Library" and then insert it in the content editor.
Both you, the instructors, and students have their own "Media Library" in BrS. You and your students can create videos using webcams, upload video and audio files, record audios in the "Media Library." All audios and videos created by you can have auto-generated caption if you enable it. So as the students.
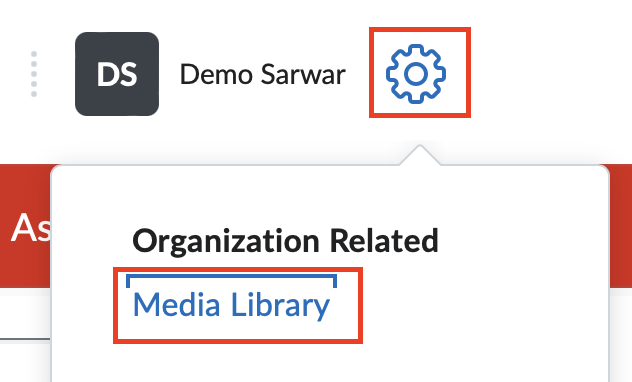
To access the "Media Library," click the gear icon on the top right and then click "Media Library." Watch a short video below to learn how to upload a video or audio file, or to create a video using your webcam.
Customizing your course homepage
Your course homepage is composed of widgets which are blocks of course information. All York courses have the same homepage layout by default:
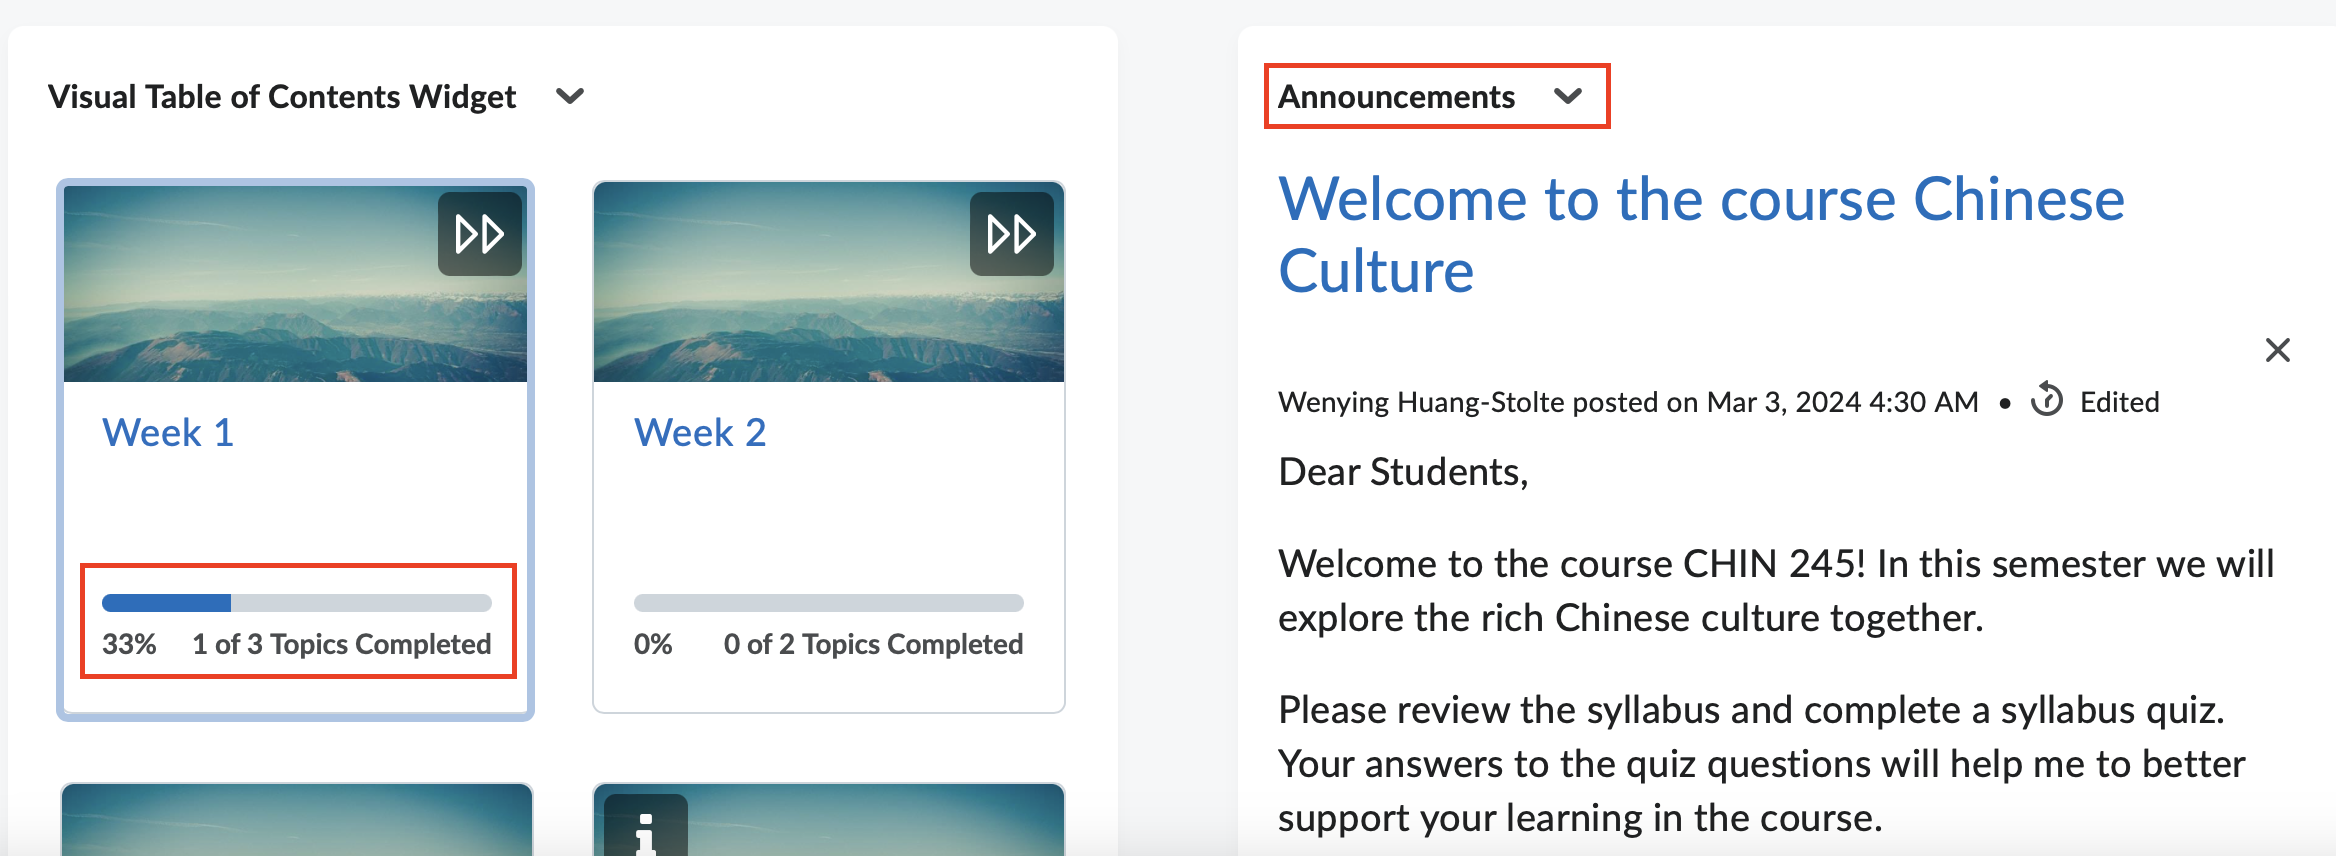
- On the right-hand side, the top widget is Announcements as it presents the course updates.
- The left-hand side is the Visual Table of Contents Widget which presents visually the percentage of the content in each of the modules that students have completed. It also enables students to jump in the module immediately where they left off.
However, if you do want to have a different layout with good reasons, you can modify the layout of your course homepage and add, remove the widgets on the homepage to meet your teaching needs. Follow the steps below to change the layout and select widgets for your course homepage.
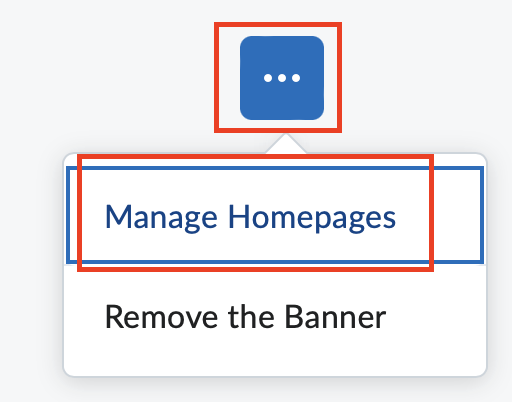
1. On your course homepage, scroll down to the bottom right, you will see a 3-dot icon. Click on it and select Manage Homepages.
2. On the Homepage tab, look for the homepage that is Active (on the right). Click the down arrow next to the name of the homepage and select Copy.

3. Now you will see a copy of the homepage is created. Click on it to make changes.

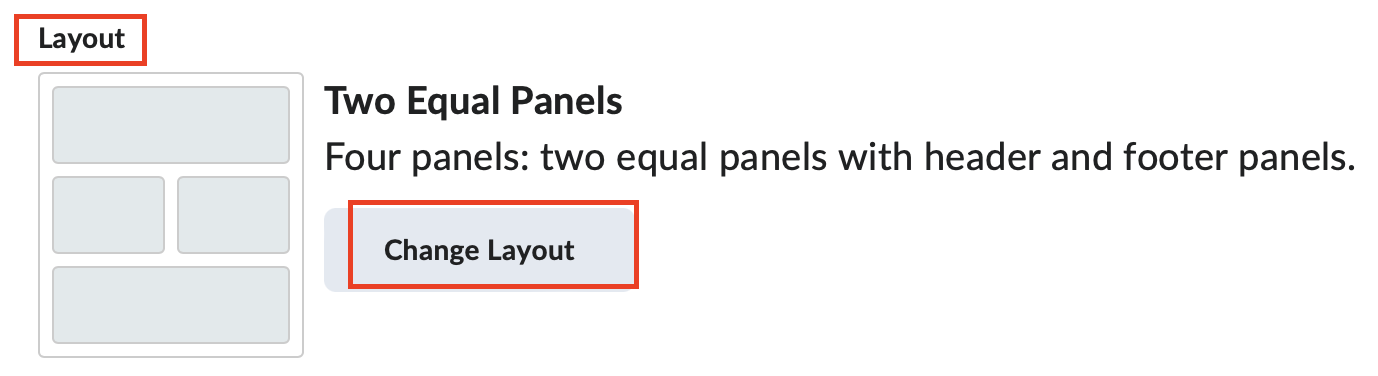
4. On the Edit Homepage screen, scroll to the middle of the page. In the Layout section, click Change Layout.
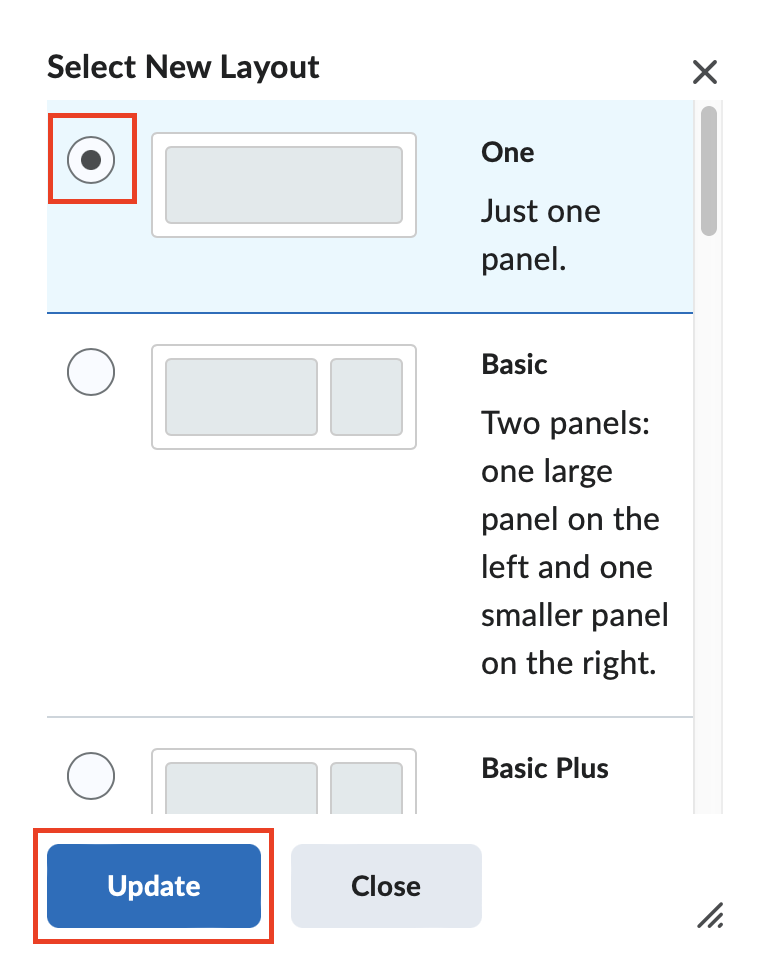
5. On the pop-up panel, review the possible layouts and select the one you want to use by clicking the radio button next to it. In this example, we choose just one panel. It is a good choice if you want students to see the course announcements mainly when they enter your course. Click Update to save the change.
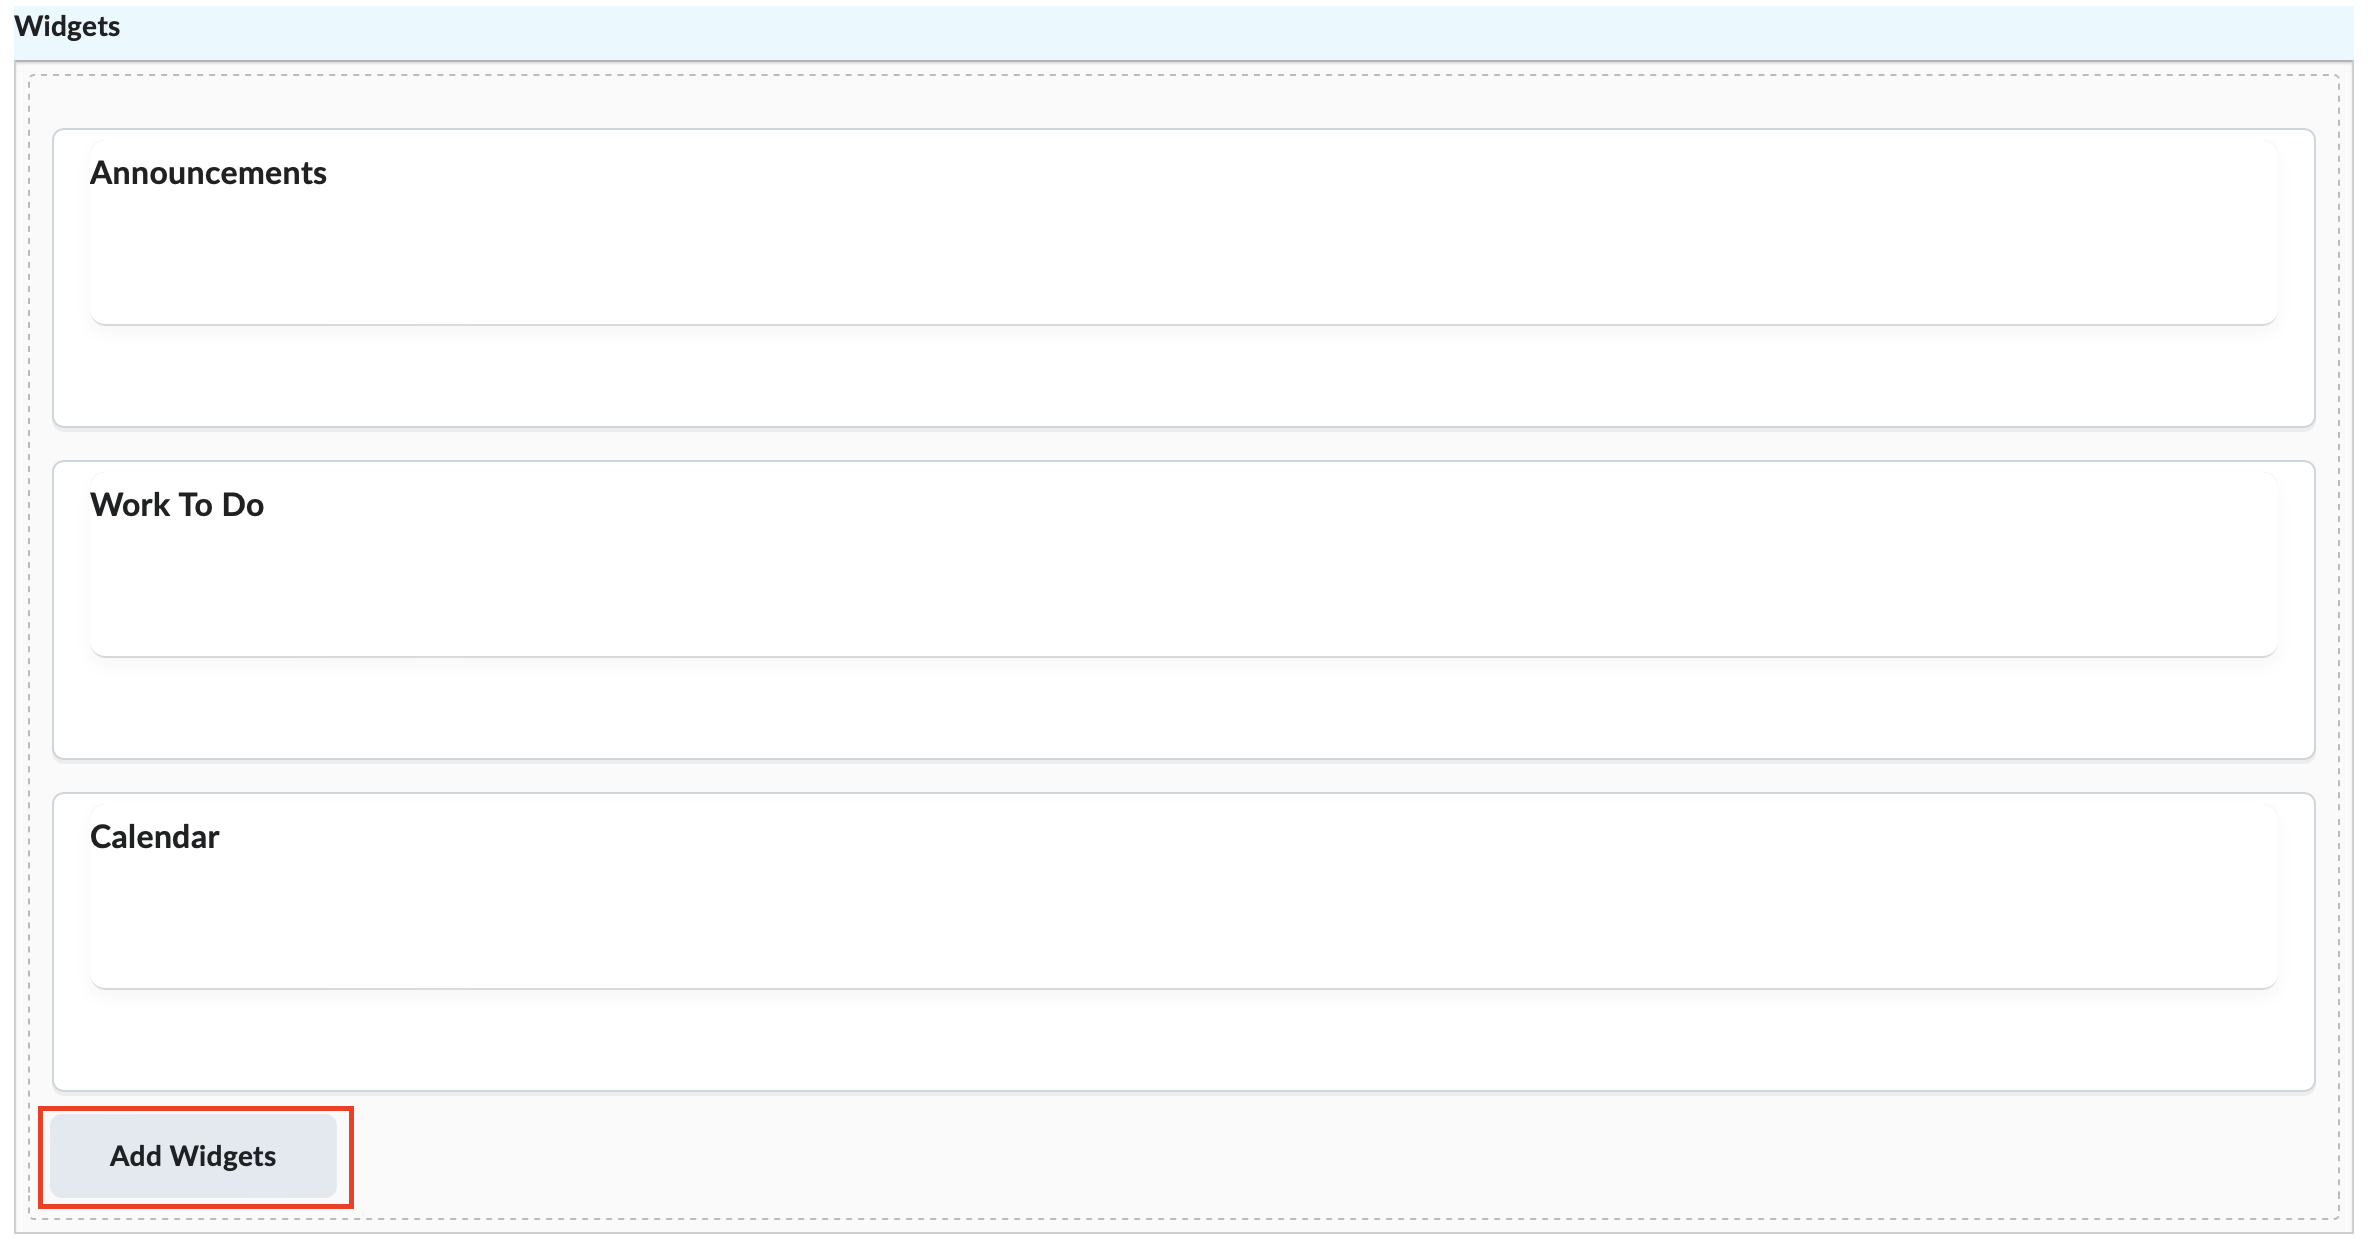
6. Now in the Widgets section, you will see one column of widgets displayed. To remove a widget you don't want, move the cursor into that box and click X on the right. The widget is removed. Repeat the steps to remove all widgets you don't want.

7. Click Add Widgets at the bottom left to add any widgets to your course homepage.
8. After you make all changes you want to the course homepage, click Save and Close at the bottom left.
9. Now you are back to your Homepage tab. Click the dropdown box under Active Homepage, and select the copy of the homepage where you made changes.
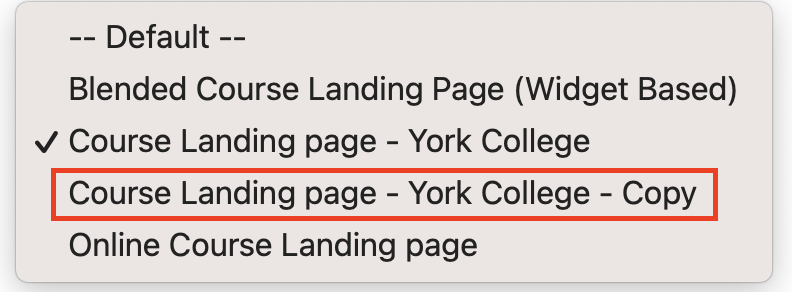
10. Click Apply.
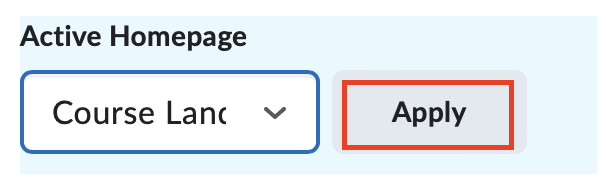
You will see a pop-up message briefly appeared at the bottom of the page stating that your chosen homepage is set as active homepage.

Go back to your course homepage by clicking your course name at the top. You will see the course homepage is displayed with your desired layout and widgets.
Viewing your course as a student
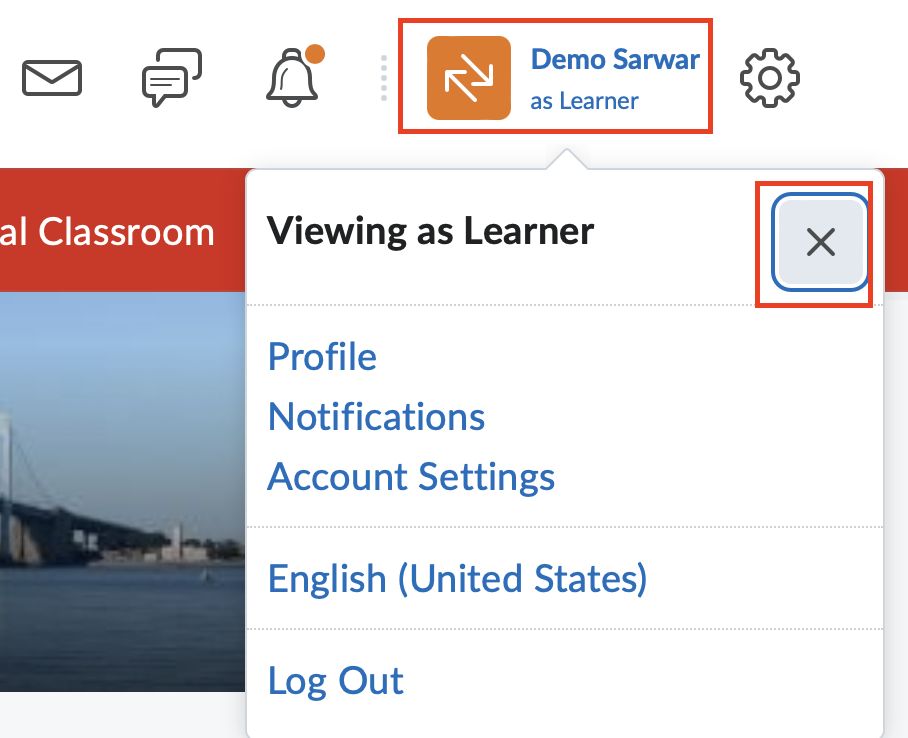
To view your course as a student, click your name on the top right and select "View as Learner." Now, you can view your course pages from a learner's perspectives.
Note: BrS will not record anything you did as a learner in your course.

To exit the learner mode, click your name again and then click the cross "X" icon.
Making changes to your course top navbar
After viewing your course as a learner, you may want to remove some links on the top navbar that students don't need or add some links to the navbar your students need to access frequently. The following steps show you how to do it.
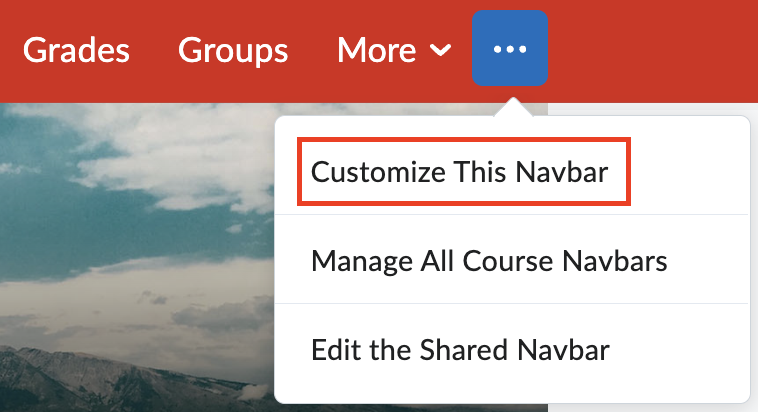
1. On the far right of your course top navbar, click the 3-dot icon and then select Customize This Navbar.
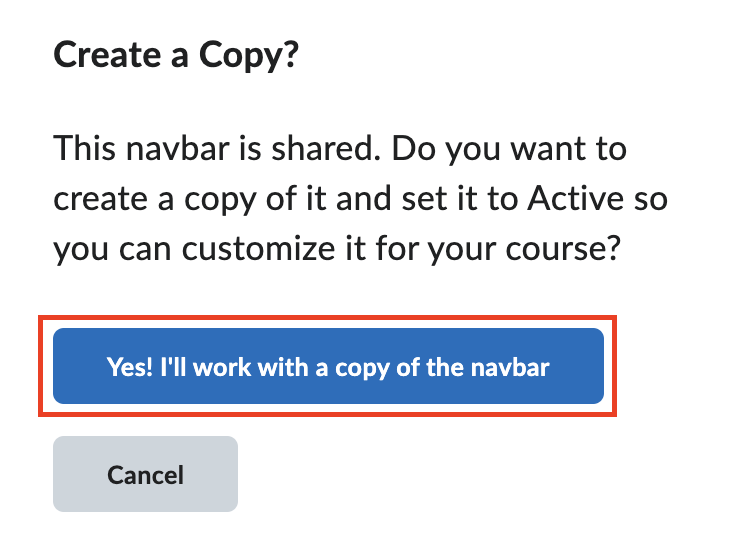
2a. If this is the first time you make change to the Navbar, a pop-up box appears. To ensure that any changes you make to the Navbar in your course do not affect the default Navbar for all courses at York, you must work with a copy of the nav bar, so click Yes! I'll work with a copy of the navbar. You can add, delete or re-order the tabs listed. When done, click on Save and Close to see the edited Navbar in your course.
2b. If you have made changes to your course Navbar, you will not see this message. You can go to step 3.
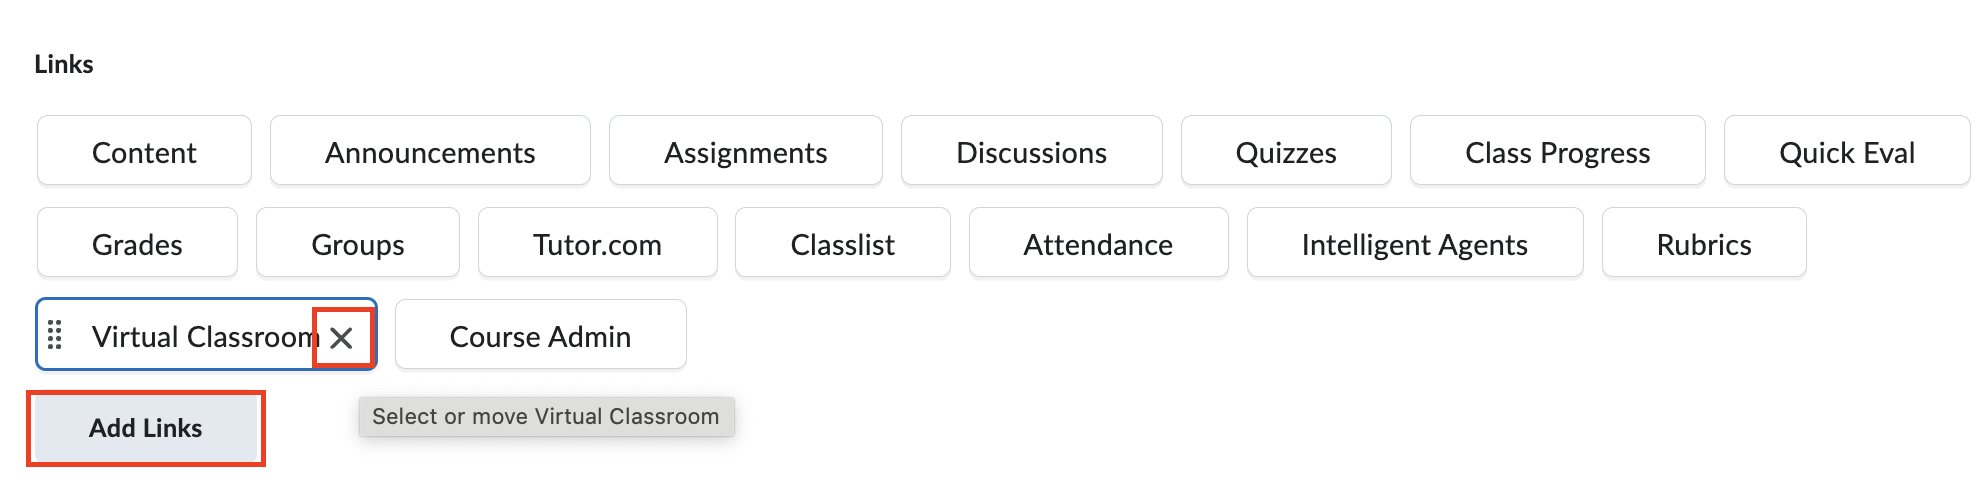
3. On the Edit Navbar page, under Links,
- to remove a link, move the cursor to the link name and then click the X sign to remove it.
- to add a tool link, click the Add Links button and then select the links to add by checking the boxes next to the tools on the pop-up window, then click Add at the bottom. As you can see all available tool links are listed here, in case you removed a link on the nav bar by mistake you can add it back.
- to change the order of the links, drag the tool link to the position of your choice.
4. When all are done, click Save and Close button to save the change.
Viewing your class roster
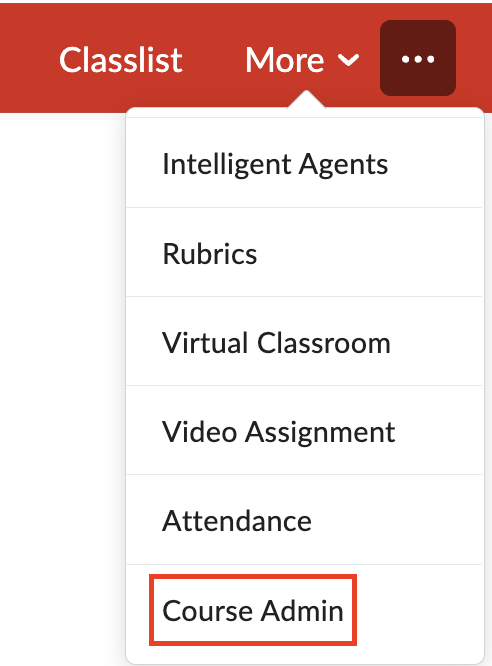
To access your class roster, click More on the far right and then select Course Admin.
On the Course Administration page, click Classlist.

Making your course available/active to students
1. On your course top navigation bar, click More > Course Admin.
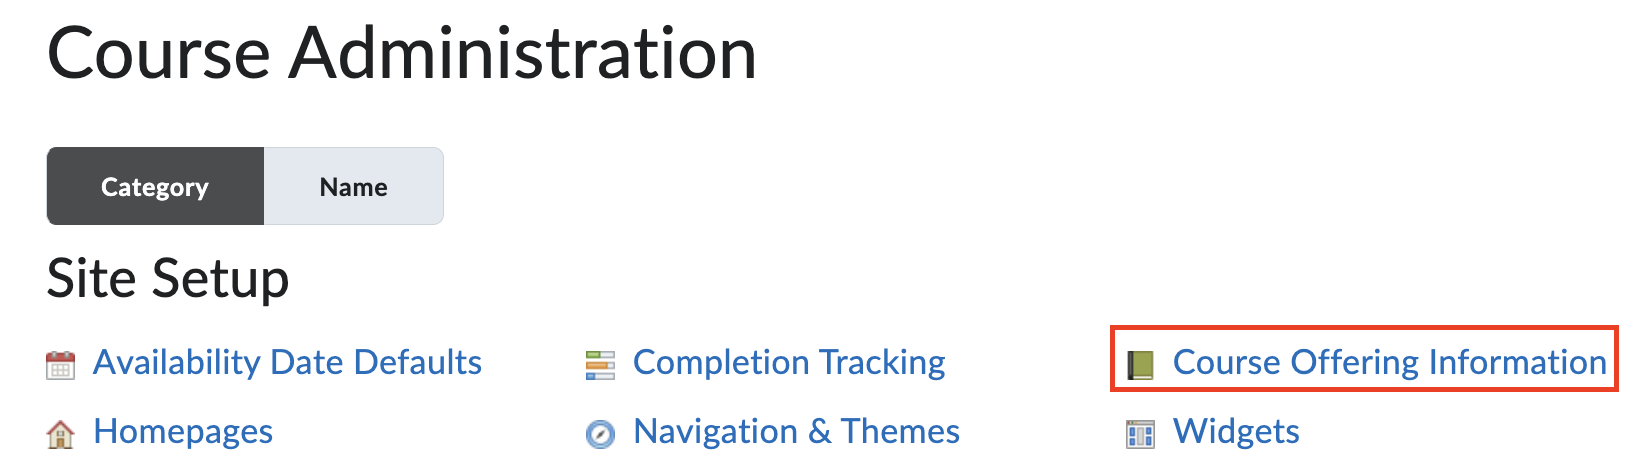
2. On the Course Administration page, click Course Offering Information.
3. Scroll down to the middle of the page. Under Active, check the box.

4. Click the Save button at the bottom of the page.
Now your course is available to students.
Creating an Announcement to welcome your students
To create an announcement,
- Click the Announcements link on your course top navigation bar.
- Click New Announcement button on the Announcements page.
- Fill in a Headline.
- Type in your message in the Content box. You can insert a video to welcome students through the Insert Stuff toolbar icon.
- Set up appropriate Start and End Dates if desired.
- Click Publish to post it in your course.
Note: In BrS, there is no check box on the New Announcement page for you to ask BrS to send the announcement to students' emails. Your announcements will be sent to students' email Inbox automatically if
- They have their York email as the preferred email in their CUNYfirst accounts.
- They check the boxes for new announcement available and announcement updated on their Notifications page. By default, the boxes for these two items are checked for all users in CUNY.
Important Note: If you attach or insert a video or audio in your announcement, students cannot watch or listen to them in the email notifications. They need to log in to your course and go to the Announcements page to watch or listen to them.
Revised: January 22, 2026
York College / CUNY
94 - 20 Guy R. Brewer Blvd.
Jamaica, NY 11451
P: 718-262-2000